
How to Launch Your First Digital Product Without a Website
The new influencer flex isn’t 100k Instagram followers. It’s selling digital products like ebooks and guides without a website. Because the thing about websites is: they take time (and money) to build. But I have some good news! You don’t actually need one.
I made over £2000 in my first month selling digital products and I want that for you too!
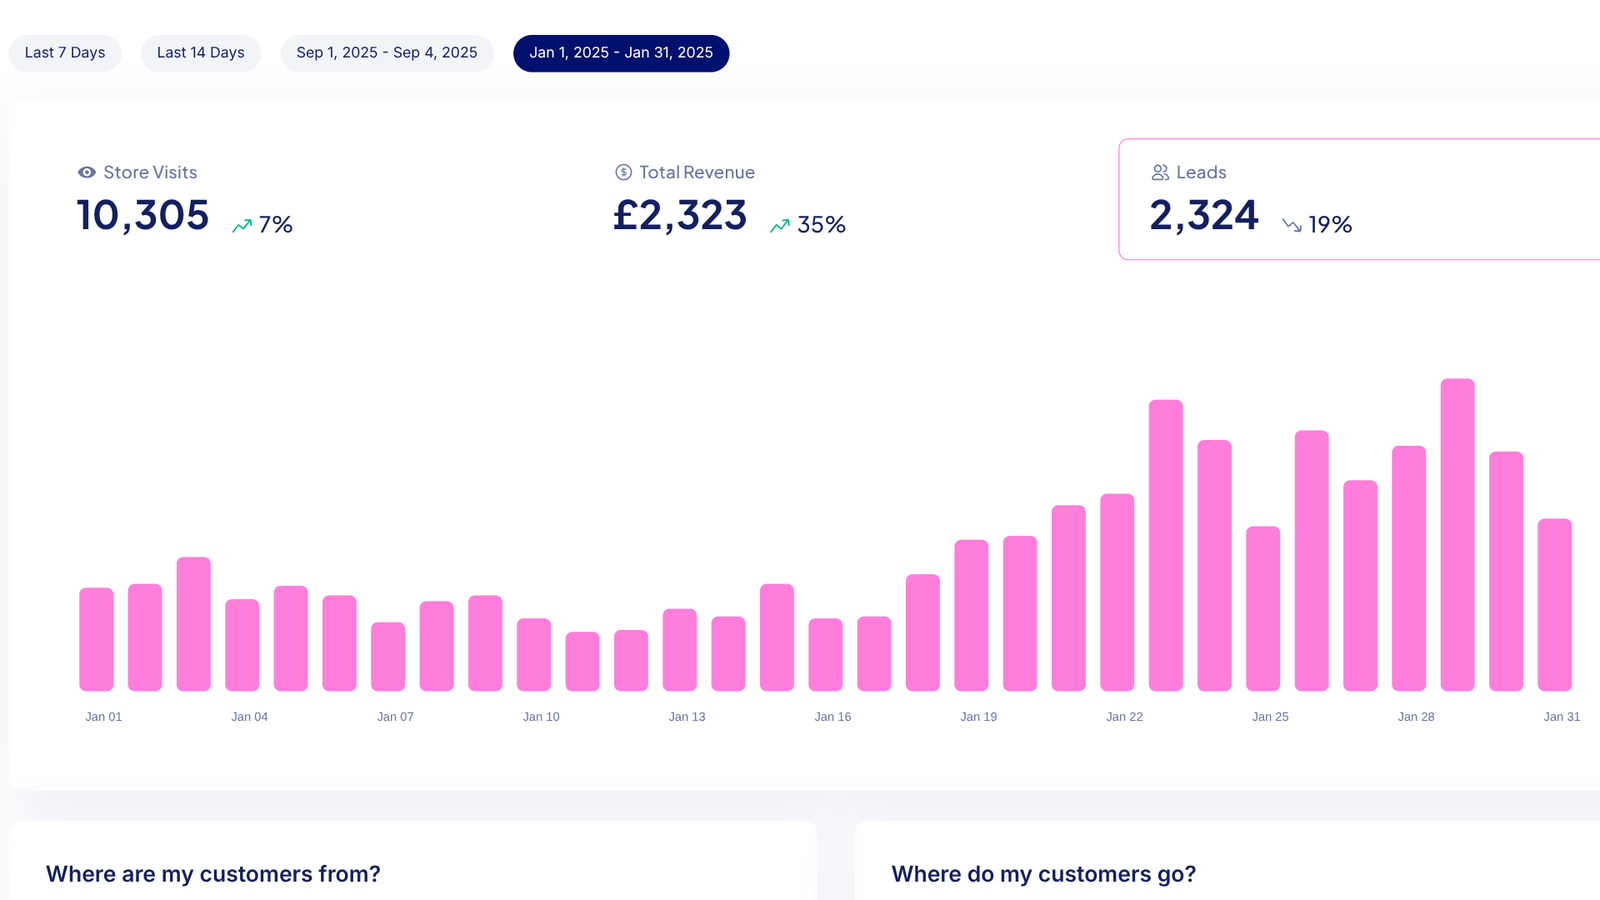
In this guide, I’m going to hold your hand and show you exactly how to launch your first digital product without touching a website. Don’t know what to sell? Go back a step and read 10 Done-For-You Digital Products You Can Start Selling TODAY.
Stan Store is a brilliant tool that lets you start selling in minutes. Honestly, it’s a total game-changer if you want to make money online without the stress of building sales pages.
By the end of this post, you’ll know how to:
- Set up your Stan Store in a few clicks
- Upload, and price, your digital product
- Share your store link with your audience
- Start making sales!!!
Disclosure: This page contains affiliate links
Why You Don’t Need a Website to Start Selling Your Products
So many people put off launching their first digital product because they think they need:
- A fancy branded website
- Expensive hosting
- Weeks of setup and design
Truth is, all you need is a product people want and a place for them to buy it. That’s it. A website can come later if you decide you need one, but right now? Stan Store gives you a ready-made digital shopfront that looks professional and handles everything.
What is Stan Store?
Stan Store is an online platform built specifically for creators and entrepreneurs who want to sell digital products, services, or memberships. Think of it as your personal digital marketplace.
With Stan Store, you can:
- Upload digital downloads (ebooks, templates, workbooks)
- Sell online courses and coaching sessions
- Take payments instantly with built-in checkout
- Share your store link anywhere (social media, email, DMs)
- Track your earnings via Stripe and/or PayPal
- Offer discounts AND payment plans
Let’s start your store:
First, we are going to create your account.
Click here to open Stan Store + get a 14 day free trial
Step 1: Sign Up for Stan Store
Head over to Stan Store’s website if you haven’t already. You’ll see a sign-up screen like this:
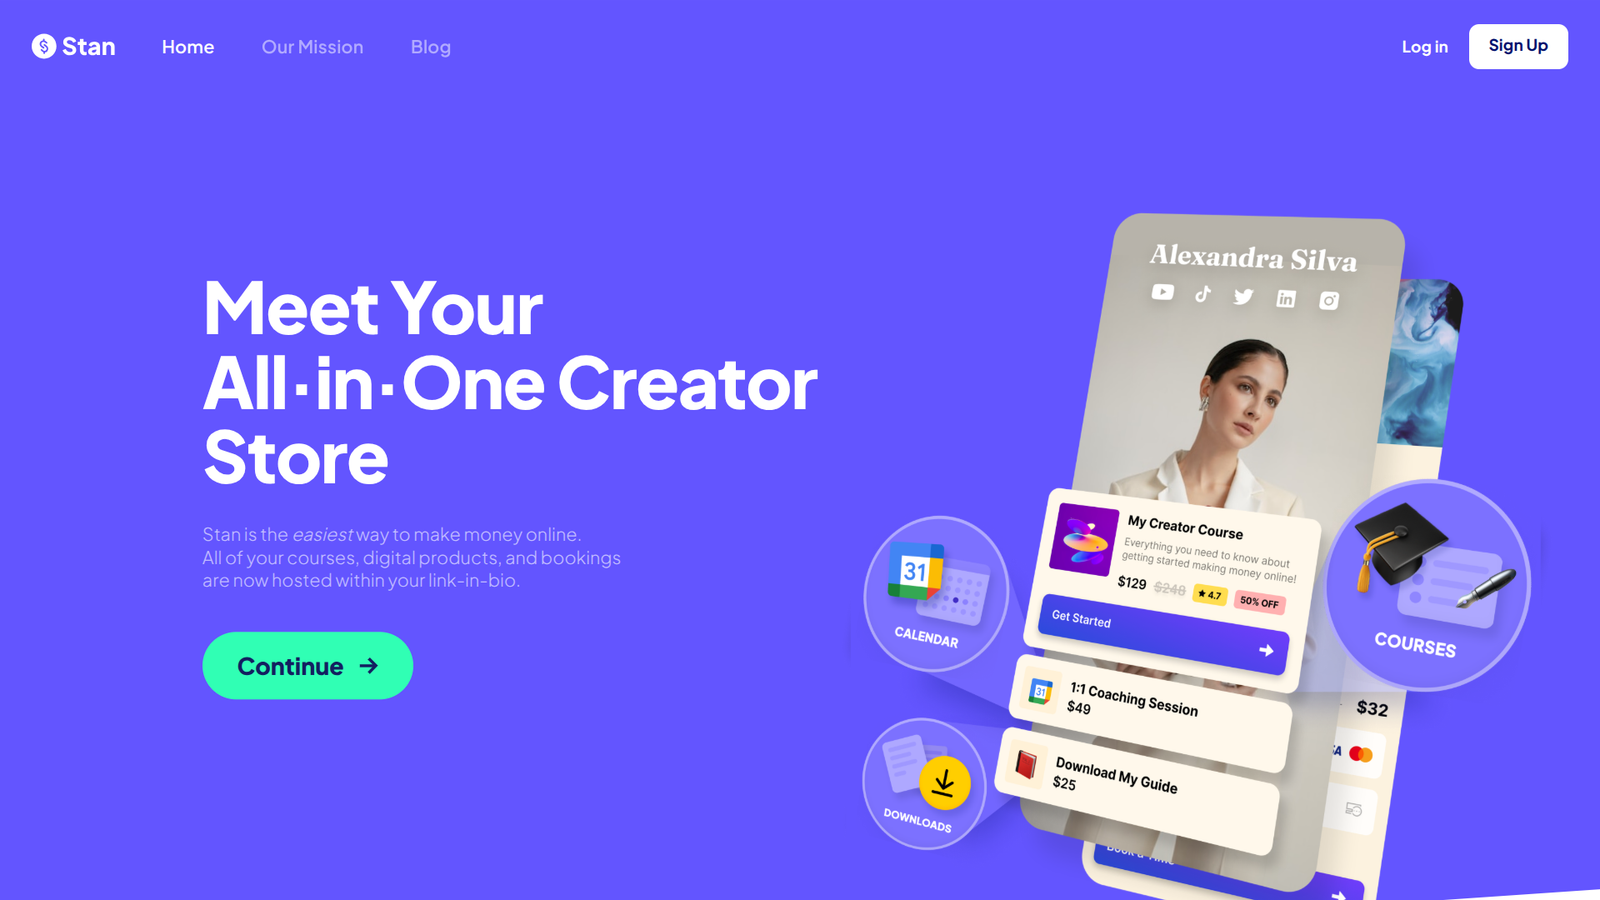
Click “Continue” to start your 14 day free trial. Stan Store offers a trial period so you can test it out before committing.
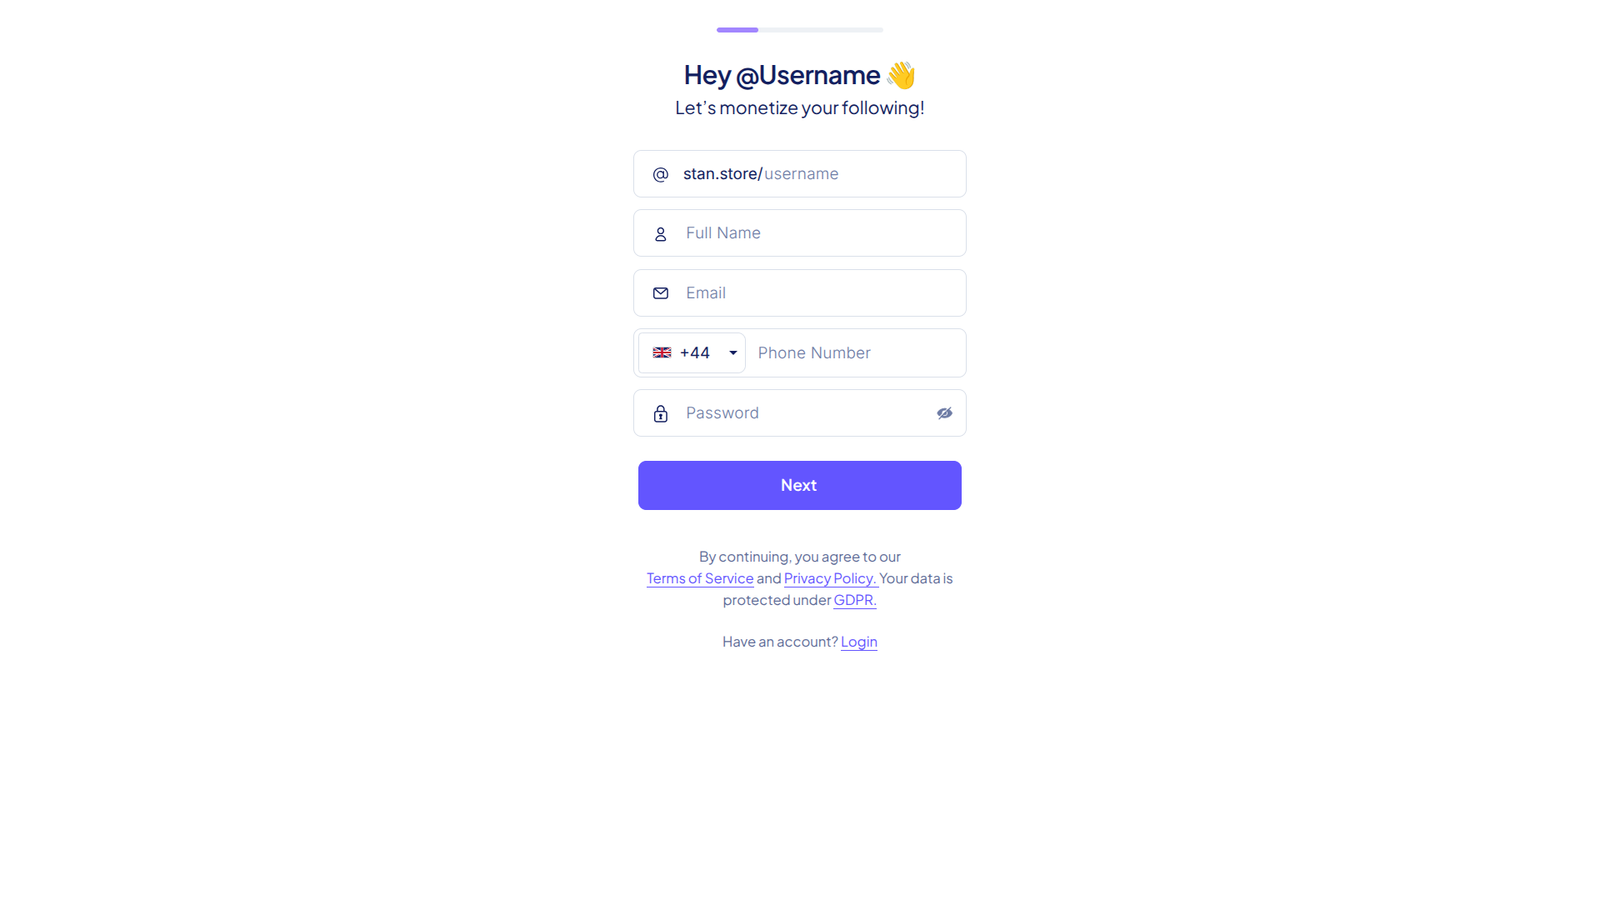
Next, fill in your details (username, email, password). Don’t overthink this, you can always update things later.
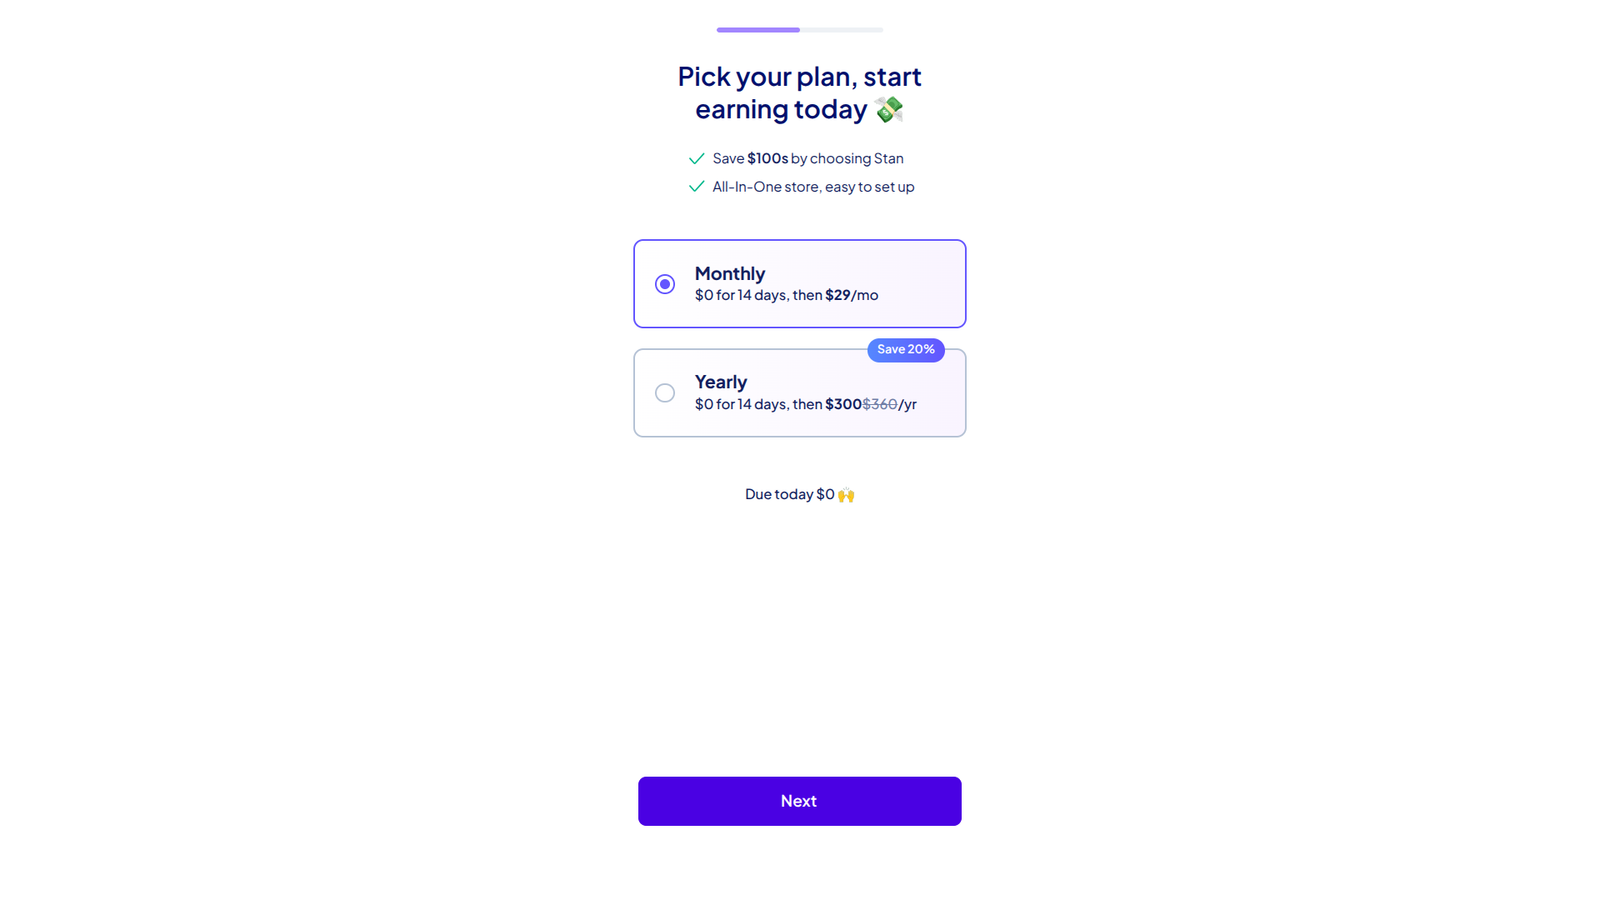
Choose how you would like to pay after your trial ends. You can choose between monthly for $29 or yearly for $300 (with a 20% discount).
And finally add your card details. Remember no money will be taken until after your 14 day free trial so you can cancel anytime up until then if you decide Stan Store isn’t for you.
Step 2: Customise Your Store
Amazing! Now that you’re logged in, let’s make your store feel more you.
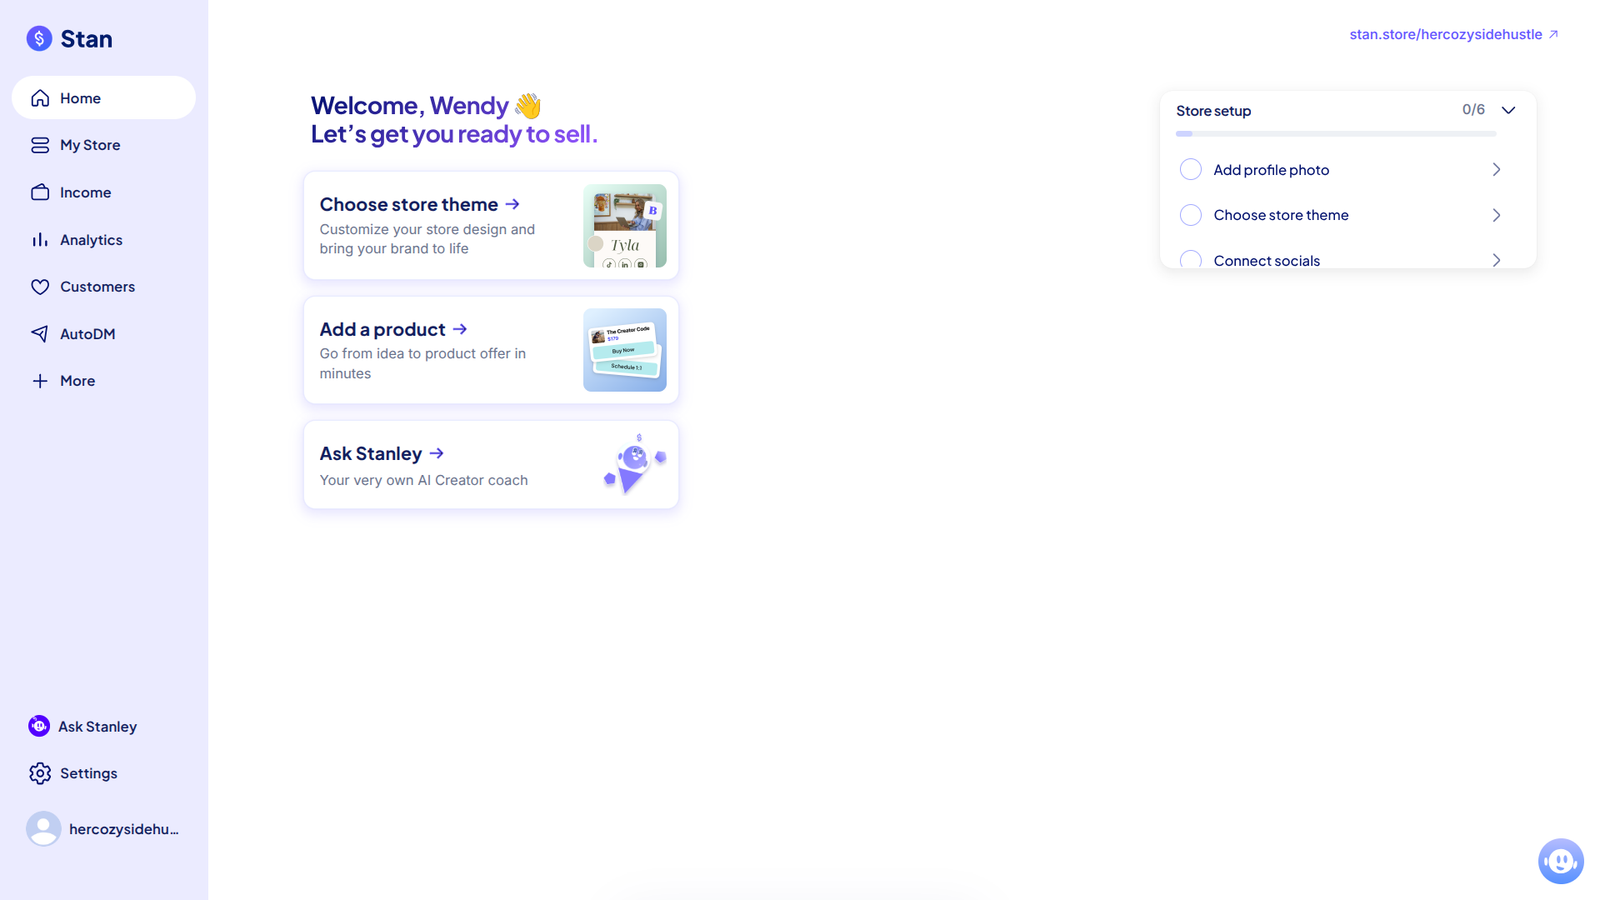
This is your Stan Store homepage. From here you’ll be able to access your storefront, income, analytics and more. Let’s get you ready to sell.
On the righthand side there’s an easy to manage store setup guide which will walk you through:
- Adding your profile photo. This will appear at the top of your store.
- Choose your theme. Stan Store gives you simple options so you don’t get lost in endless design choices.
- Connecting your socials. Especially important if you’re a content creator and want people to find you easily.
- Create your first product. I’ll walk you through this next.
- Add payment info. So you can start earning money!
- Create a marketing post. Their AI tool will write your first social media post for you.
Don’t worry about making it perfect. The goal is to get your store live quickly. You can tweak things later.
Step 3: Upload Your First Digital Product
You’re nearly there! You’ll be making money soon.
Now you get to add your digital product!
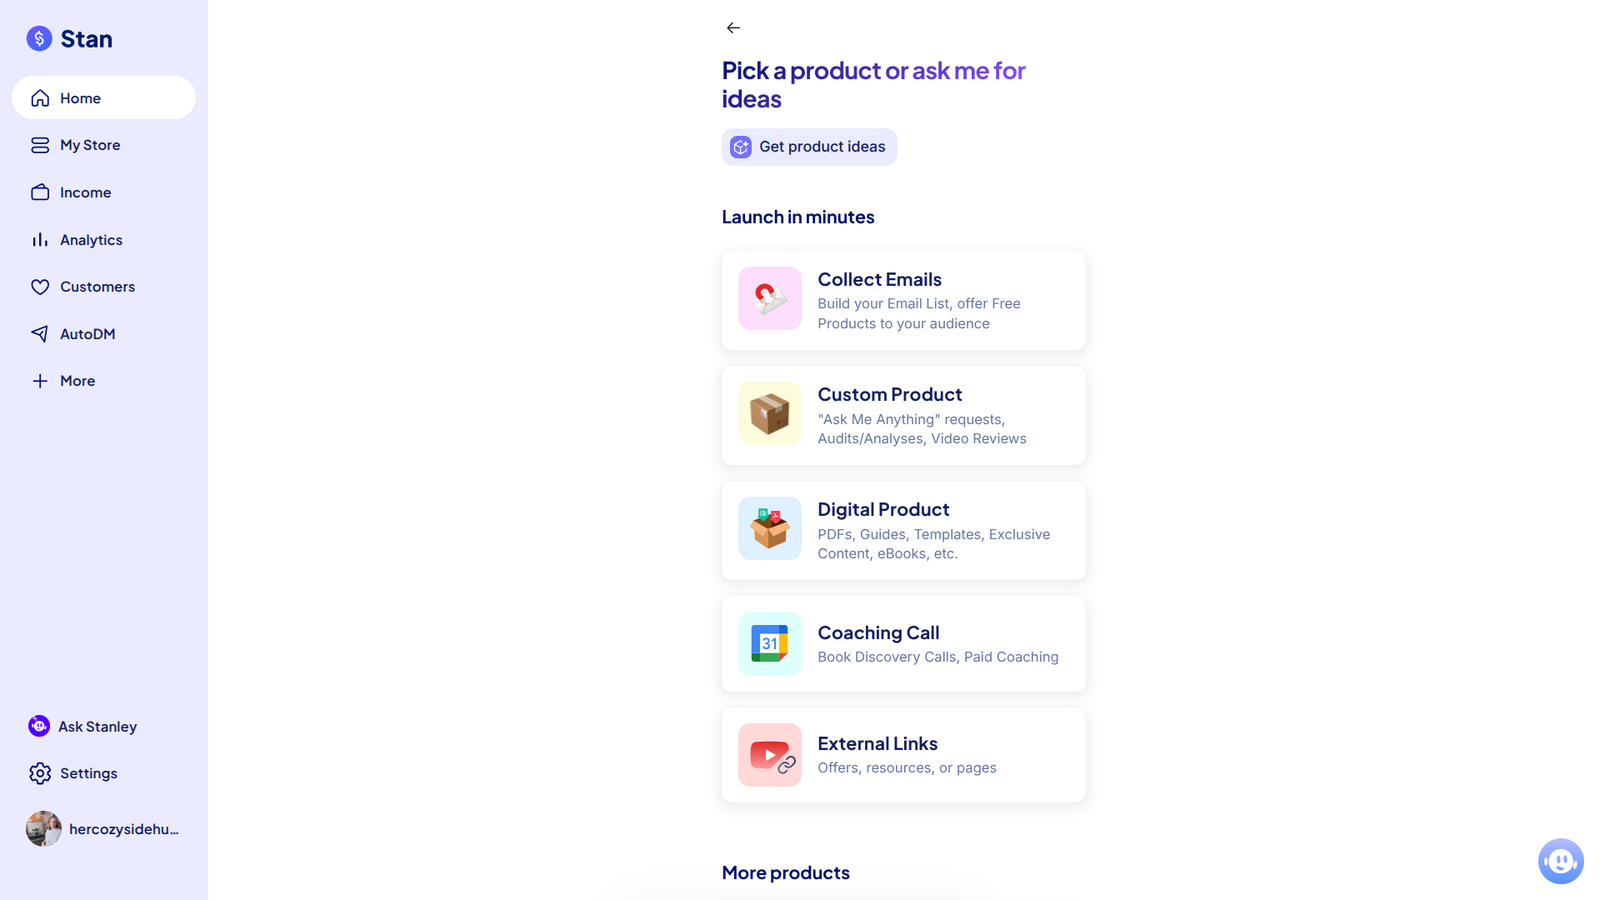
Click on “Add a Product” in your dashboard. You’ll see different options (custom product, coaching call, collect emails, etc.). Choose Digital Product for now.
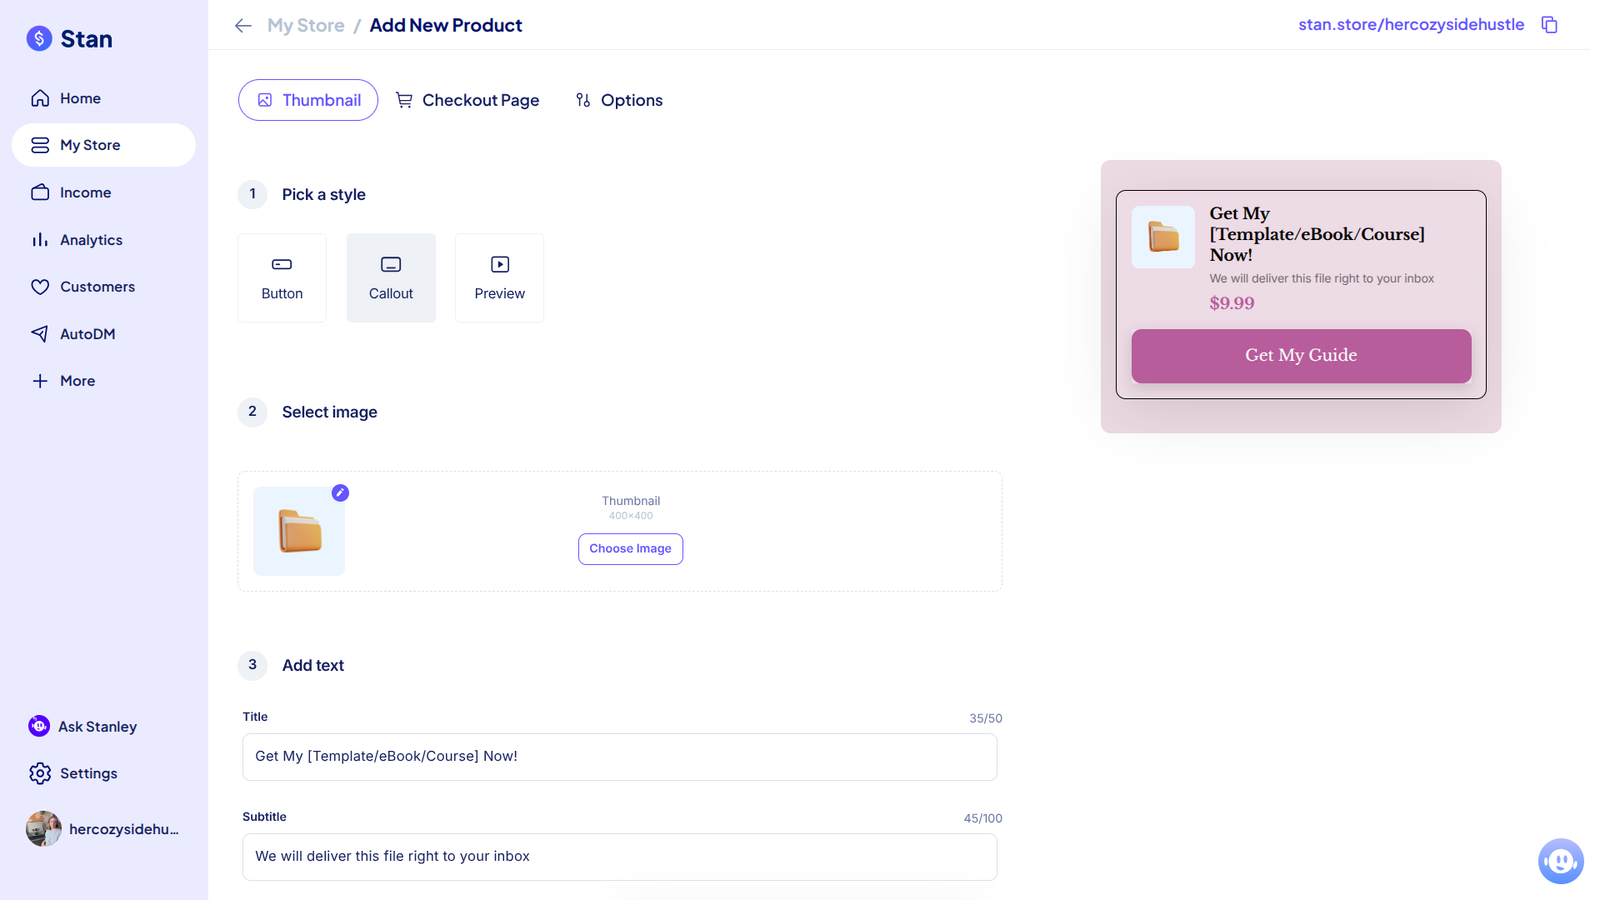
Here’s what you’ll need to fill in:
- Select Image – Upload your thumbnail image
- Product Title – Keep it clear and descriptive. For example: “30-Day Meal Planner” or “Instagram Caption Templates.”
- Subtitle – Explain what your product is and who it’s for. Keep it simple and highlight the benefit.
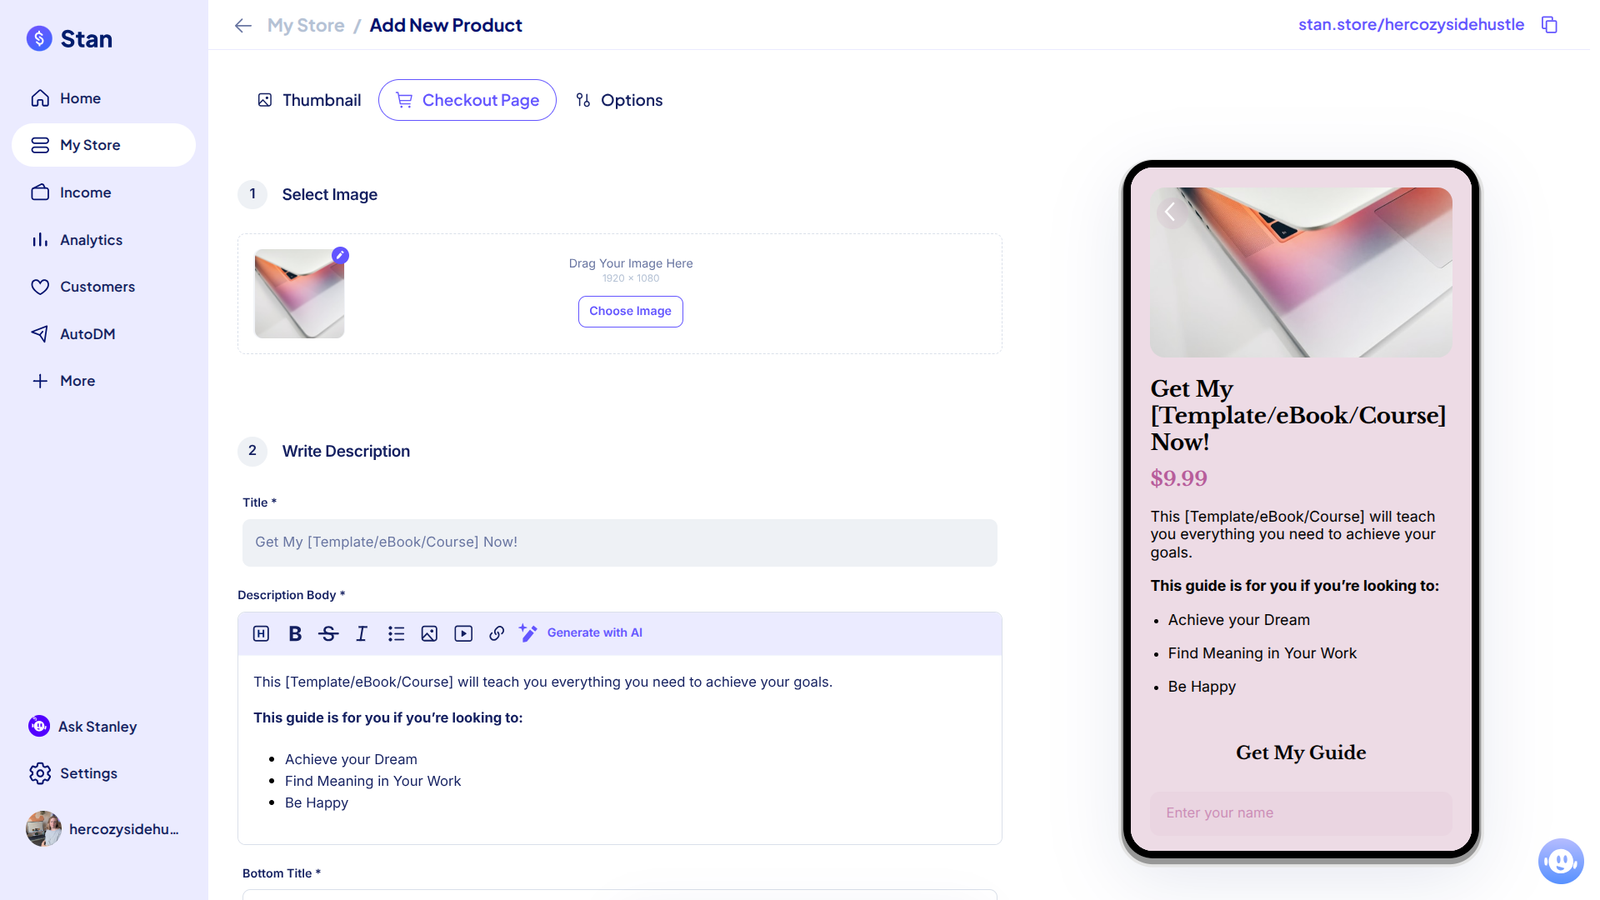
Save as a draft. Before you hit publish click on the Checkout Page tab at the top:
- Header Upload – Use a different image from your thumbnail, perhaps a sneak peek at what’s inside.
- Description Body – Tell people about your product and what they can expect to see inside. This is a good space to explain the benefits.
- Price – Decide how much you want to charge. You can always change it later.
- Product Upload – This is where you upload your PDF, template, or zip file. Stan Store automatically delivers it to buyers after purchase.
One last step before you publish. This is very important and easy to overlook.
On the last tab, under “Options”, Scroll down until you see Confirmation Email. You don’t want to touch anything highlighted in blue but everything else is editable.
I think it’s important to personalize this email by adding a touch of your personality, and a few links to your socials or other digital products.
Click Save — you’ve just created your first product. Congratulations!
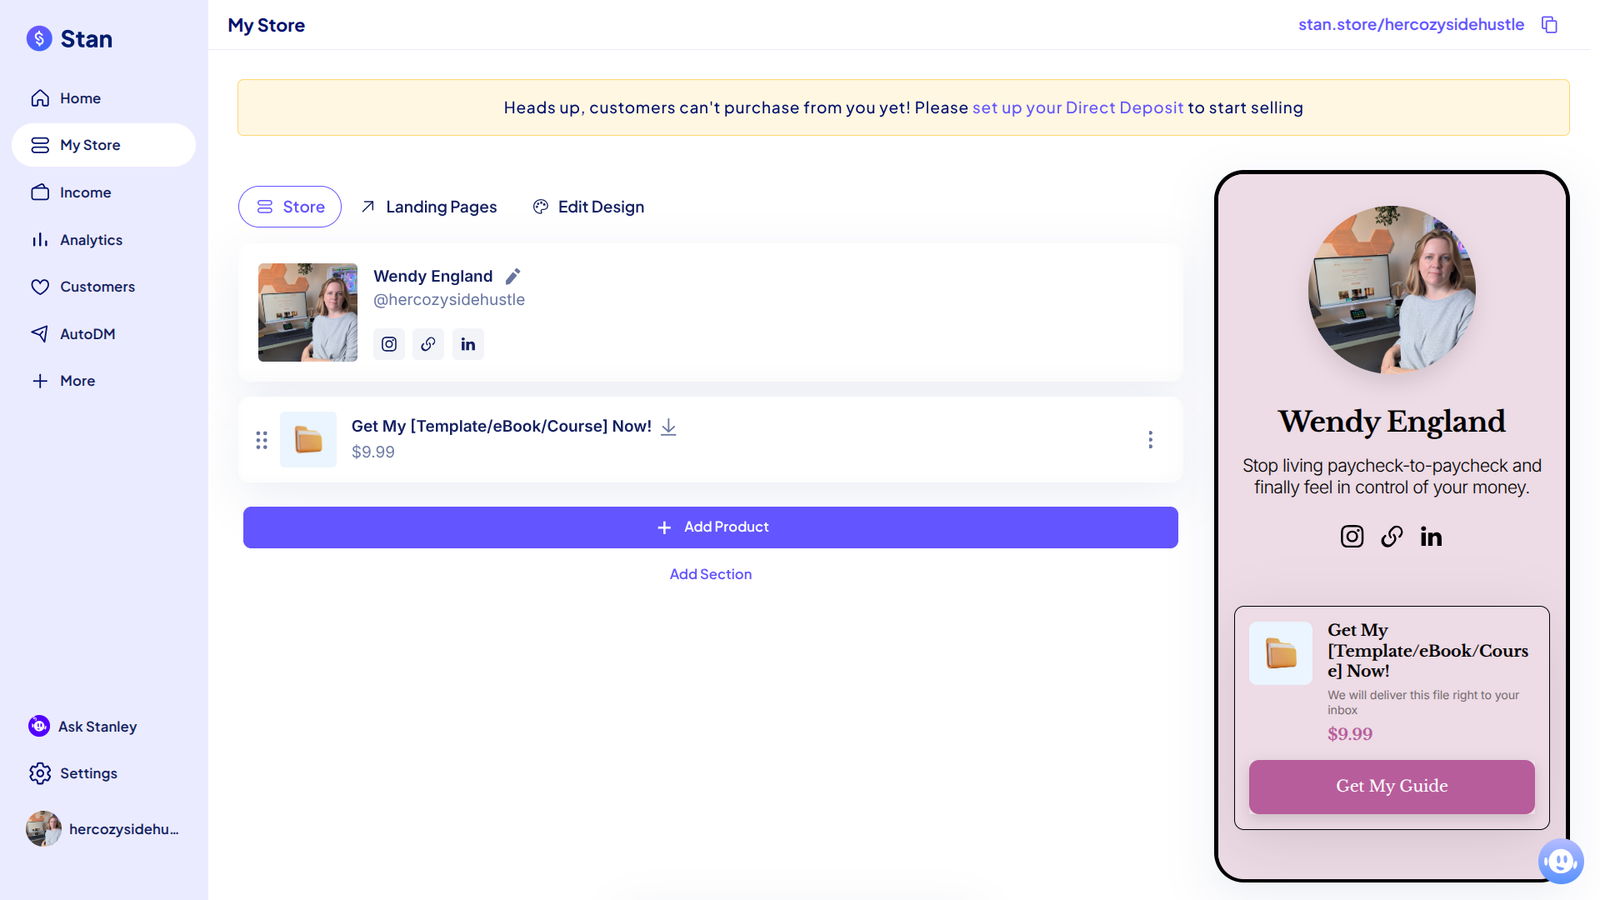
How To Make Money with Stan Store
Now your product is live, it’s time to spread the word.
In the top right hand corner you’ll find your unique link. Copy it.
Add your link to your Instagram, TikTok, LinkedIn, YouTube, even you email signature. Anywhere you are online you should have your link.
Make it easy for people to find it.
Remember, you don’t need a big audience to make sales. Even a small, engaged group of people can bring in consistent income if your product solves their problem.
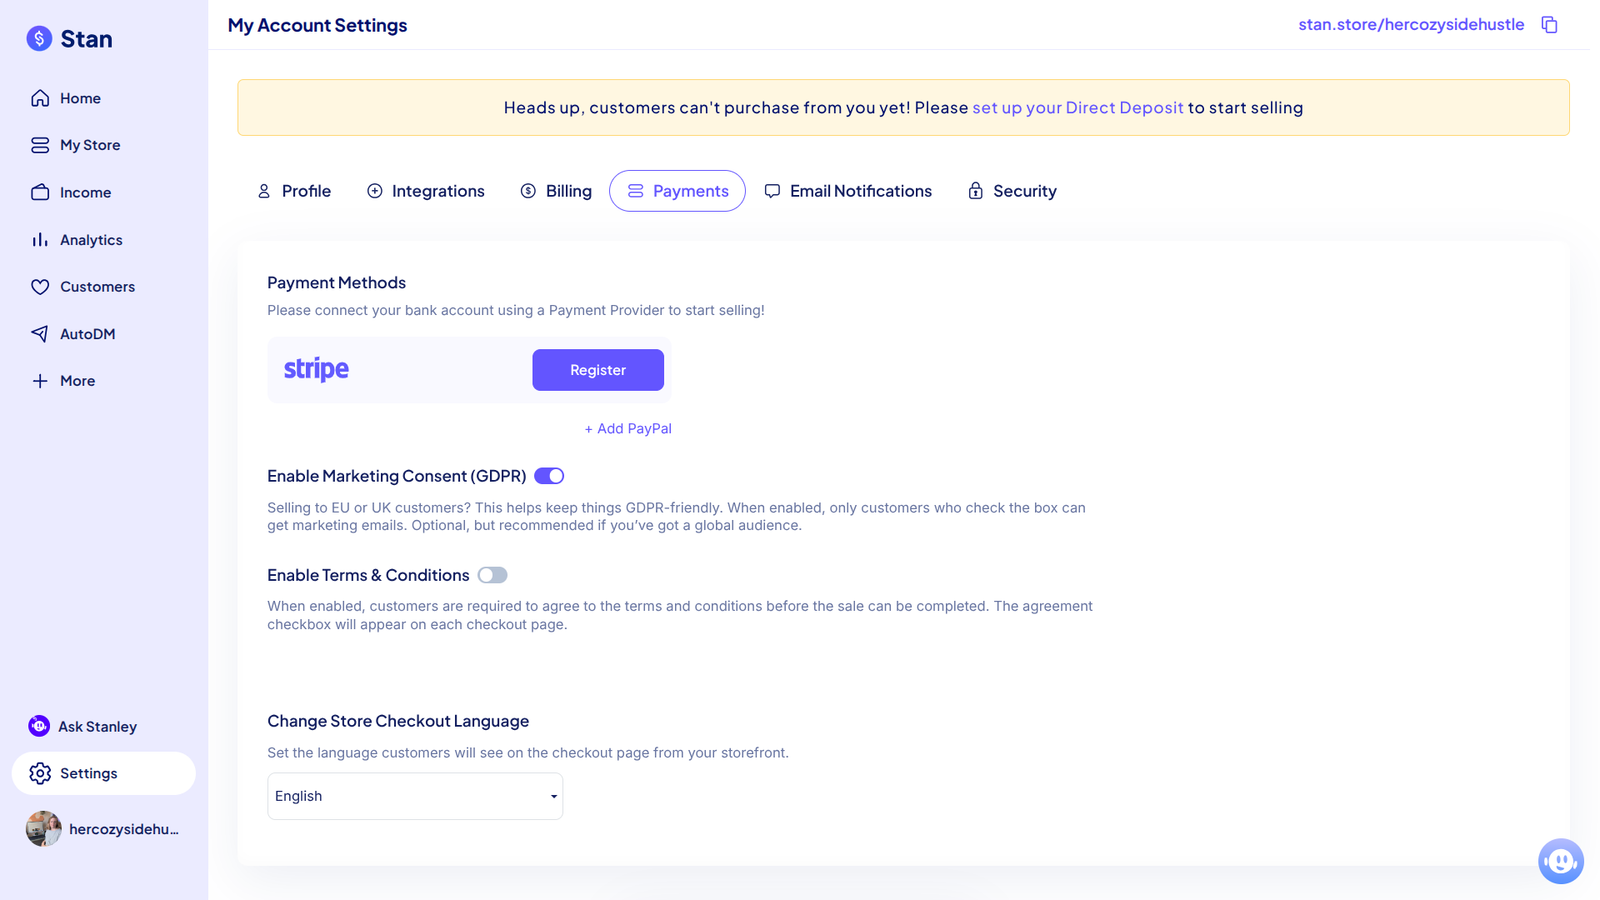
See that yellow bar across the top, click it. You need to add how you’d like your customers to pay you.
The more options the better, don’t assume everyone has PayPal. If you can, connect Stripe too so they can pay you by card.
PayPal and Stripe do have their own processing fees but Stan doesn’t. You’ll need to factor this in when pricing your products.
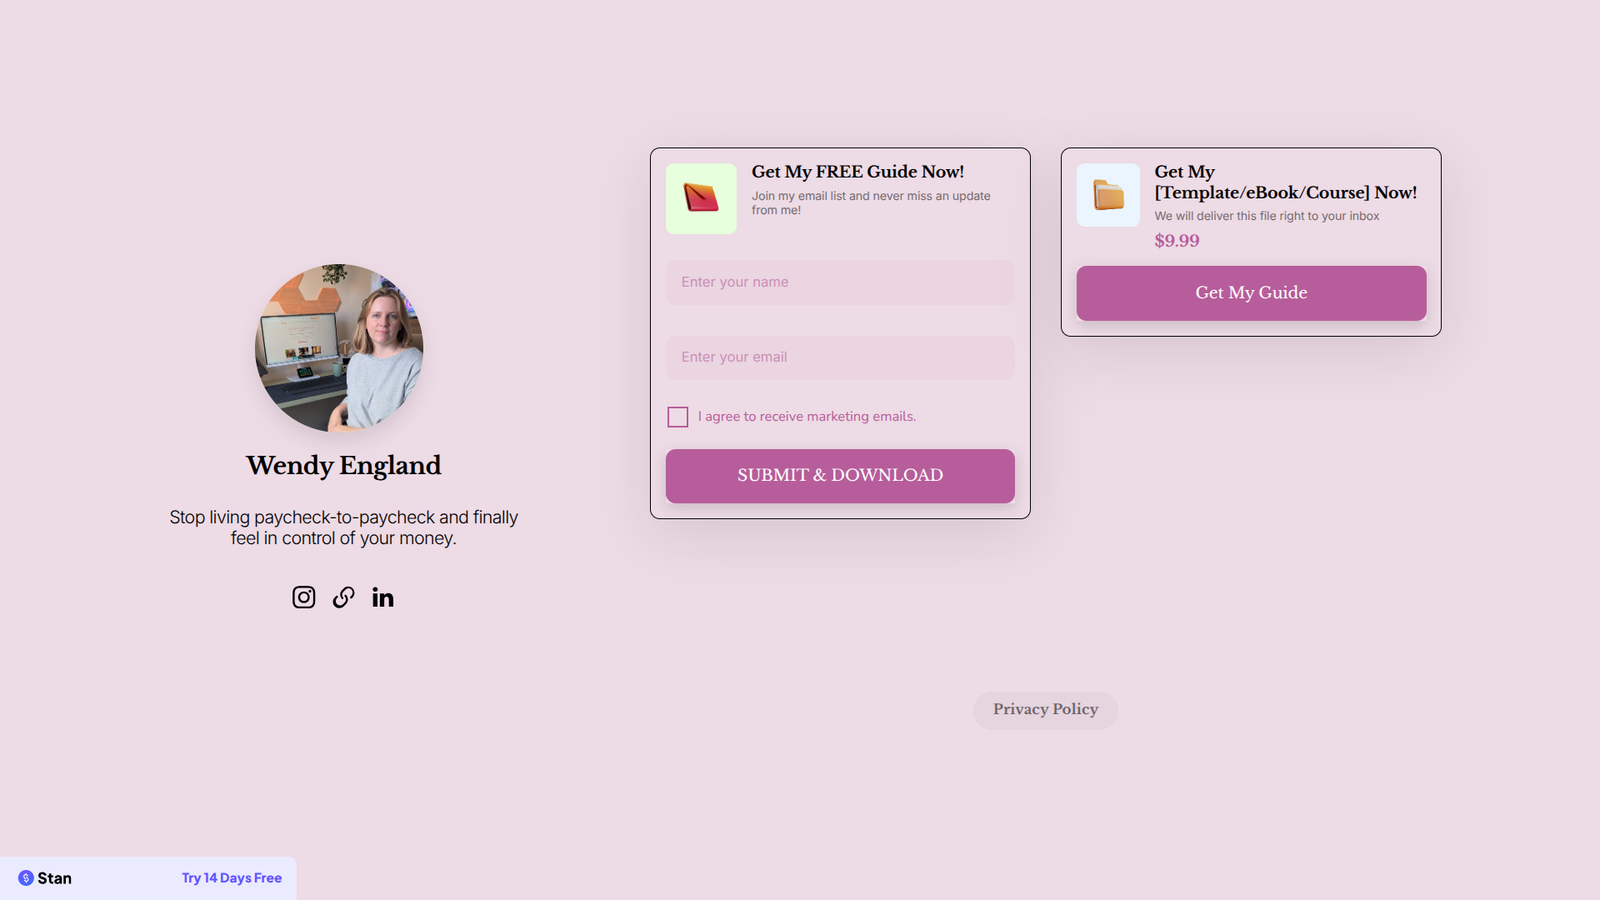
Congrats—you’ve launched your first digital product without a website! That’s no small thing.
From here, you can:
- Add more products to your store (templates, mini-courses, free opt-ins)
- Bundle items together for higher-value offers
- Experiment with different price points
- Upgrade your Stan Store plan for advanced features (like email capture and automation)
Each little tweak helps you build a sustainable online business without ever worrying about coding or WordPress plugins.
Why You Need an Email List (and How Stan Store Makes It Simple)
Did you know that it can take a person seeing your offer, on average, 7 times before they’re ready to buy?
That number isn’t fixed (some folks will buy right away, others might need 20+ touchpoints), but 7 is the common benchmark in marketing.
That’s why an email list is so powerful. Instead of hoping people stumble across your store again, you can pop straight into their inbox with helpful tips, updates, and gentle reminders about your product.
Normally, this is where things get messy. You’d need to sign up for a separate email provider—like MailChimp or Flodesk—connect it to your store with fiddly integrations, and pay an extra subscription on top (easily another £20–£50 a month). Then there’s the learning curve of figuring out automation, tagging, and sequences. Honestly, it can feel like you need a degree just to send a welcome email.
With Stan Store’s Creator Pro Plan, you skip all that hassle. Built-in email tools mean you can:
- Collect email addresses automatically when someone visits your store.
- Set up simple email flows (like a welcome series or product follow-up) in minutes.
- Keep all your customer data in one place—no messy integrations or spreadsheets.
Not only does this save you £100’s a year in extra software costs, it also saves you time and headaches. Instead of juggling three different platforms, everything runs smoothly under one roof.
But if you’ve never had an email list before and want to dip your toes in FOR FREE, I show you how in my latest post How to Start an Email List From Scratch.
Tips for Success With Stan Store
To make the most of your store, keep these in mind:
- Start simple. Don’t overwhelm yourself with ten products at once. One solid product is better than a messy shopfront.
- Focus on solving a problem. Your digital product should make someone’s life easier, faster, or more enjoyable.
- Keep promoting. Don’t be shy about sharing your link regularly. Most people need to see it multiple times before they buy.
- Listen to feedback. If customers ask for something, consider turning it into your next product.
Why I Recommend Stan Store Over a Website (at First)
You might be wondering: “Shouldn’t I just build a website straight away?”
Here’s why I suggest starting with Stan Store instead:
- Zero setup stress. You’ll be live in minutes, not weeks.
- Lower costs. No domain, no hosting—just one simple plan.
- Mobile-friendly. It looks great on phones, where most of your audience hangs out.
- Built for creators. Instead of wrestling with tech, you can focus on making and selling.
When (and if) you want a website later, you’ll already have a proven product and an audience. That makes building a site much less risky. I can walk you through how to set up hosting for your first website.
Ready to Launch Your First Digital Product?
If you’ve been sitting on an idea like an ebook, a set of templates, or a mini-course, today is the day to take action. You don’t need a website. You don’t need a massive following. You just need Stan Store and the confidence to hit publish.
Click here to start your free trial with Stan Store and get your first product out into the world.
Trust me, once you see that first sale notification, you’ll wonder why you didn’t start sooner.