How to Start an Email List From Scratch (for FREE!)
I’ve talked quite a bit recently about the importance of having an email list. I think it’s one of the most critical things to do in the process of starting your business.
On social media your latest content isn’t always shown to your followers. It’s great for reaching a new audience but not nurturing your current one. An email newsletter is the only way you can directly talk to the people who want to keep in touch with you. There’s nothing more personal than landing in their emails to say a warm hello once or twice a month.
In this guide, I’m going to show you exactly how to start an email list completely free. If you’ve been putting this off, today’s the day we fix that.
By the end of this post, you’ll know how to:
- Set up your first email list
- Build a simple signup form or landing page
- Collect your first subscribers
- Send your first email
Disclosure: This page contains affiliate links.
Why You Need an Email List (Even if You Don’t Have a Website)
Let’s clear this up straight away.
You do not own your Instagram followers.
You do not own your YouTube audience.
You do own your email list.
Social platforms change. Algorithms update. Accounts can disappear overnight. Your email list is yours.
An email list lets you:
- Stay in touch with people who actually want to hear from you
- Share updates, tips, or offers directly to their inbox
- Build trust over time (this matters more than follower count)
- Make money later, even with a small audience
And no, you don’t need thousands of subscribers. A tiny but engaged list beats a massive silent one every time. And right now, Kit automates your email marketing so you can focus on creating content you love.
What Is Kit?
Kit is an email marketing platform built specifically for creators, bloggers, and small business owners. It’s designed to be simple and easy to use for beginner marketers.
With Kit, you can:
- Create an email list for free
- Build a signup form and landing page (no website needed)
- Send newsletters and emails
- Set up one automation
- Tag and organise subscribers
- Sell digital products later if you want to
Kit has a free plan, which makes it perfect if you’re just getting started.
Let’s Start Your Email List:
First things first. We’re creating your account.
Click here to open Kit and sign up for free
Step 1: Sign Up for Kit
Head over to Kit’s website if you haven’t already. You’ll see a sign-up screen like this:
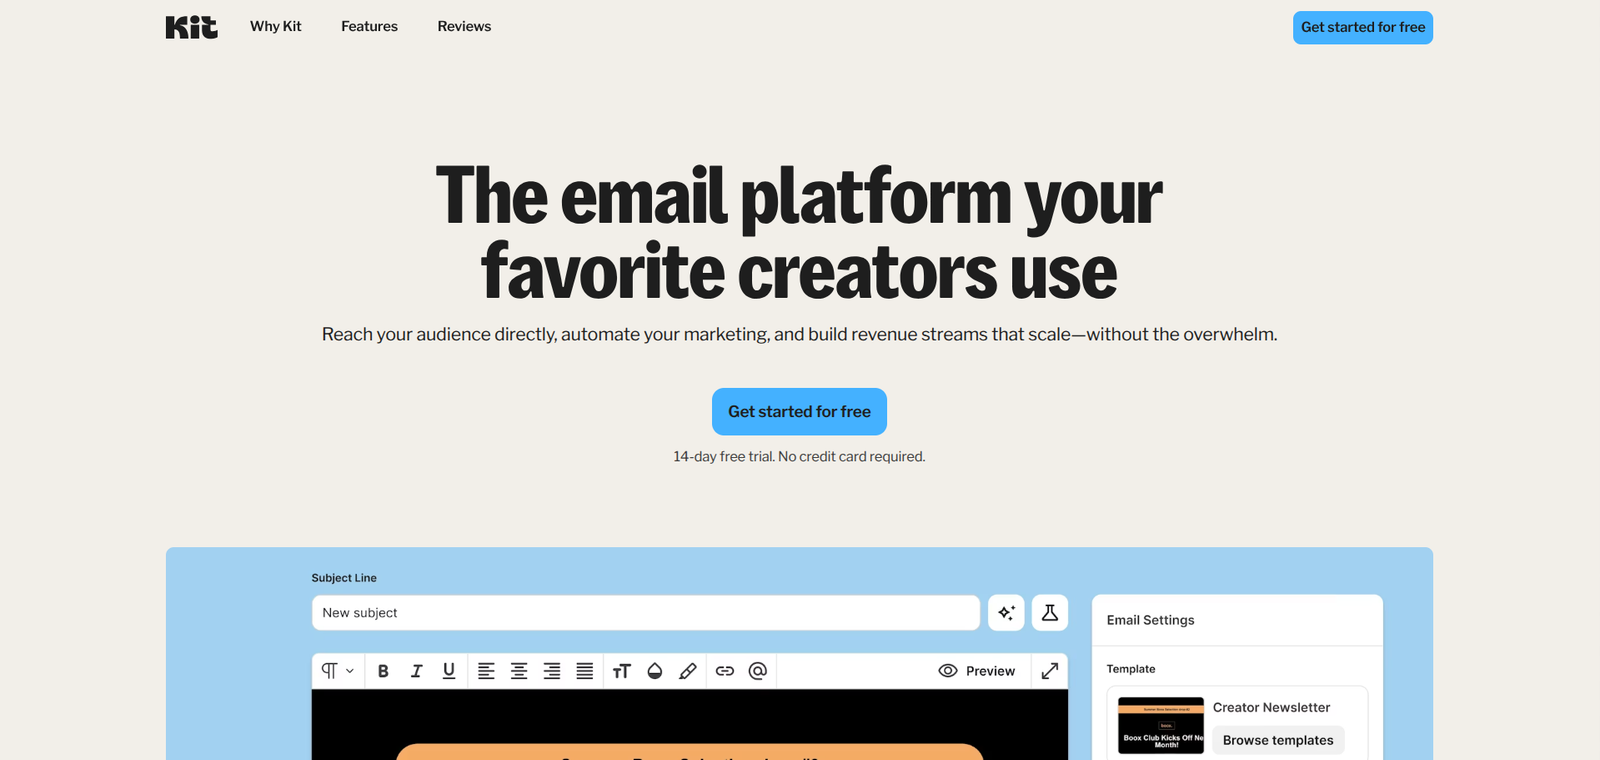
Click “Get Started For Free”. Next, fill in the following details:
- Your name
- Your email address
- A password
Once you confirm your email, you’ll be taken through a short quiz to help the platform better understand what you need.
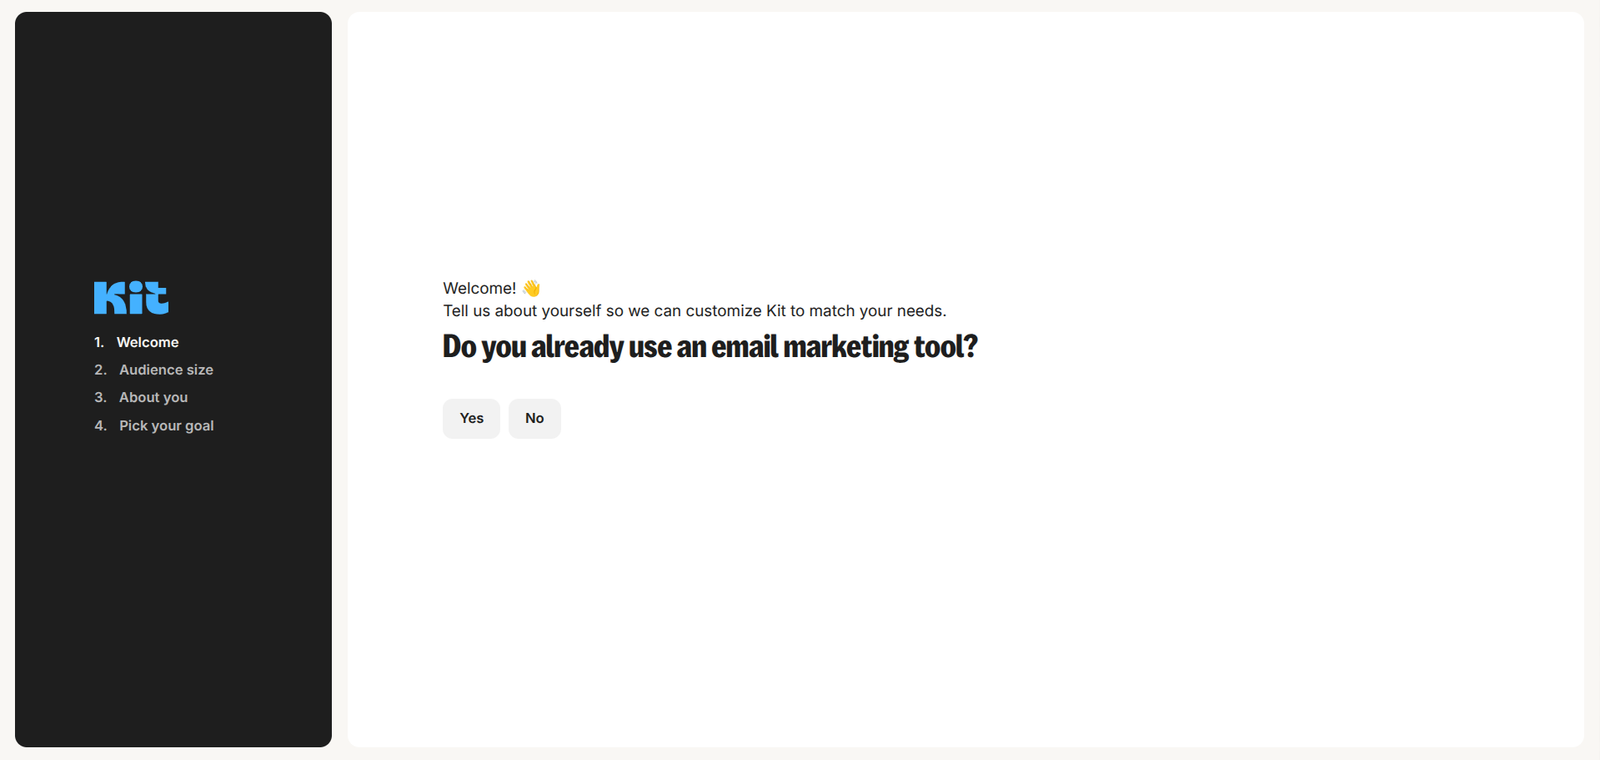
When you get to the “About You” page don’t change your URL name, as this should now be your business name plus Kit’s. It’s clean and straightforward for browsers.
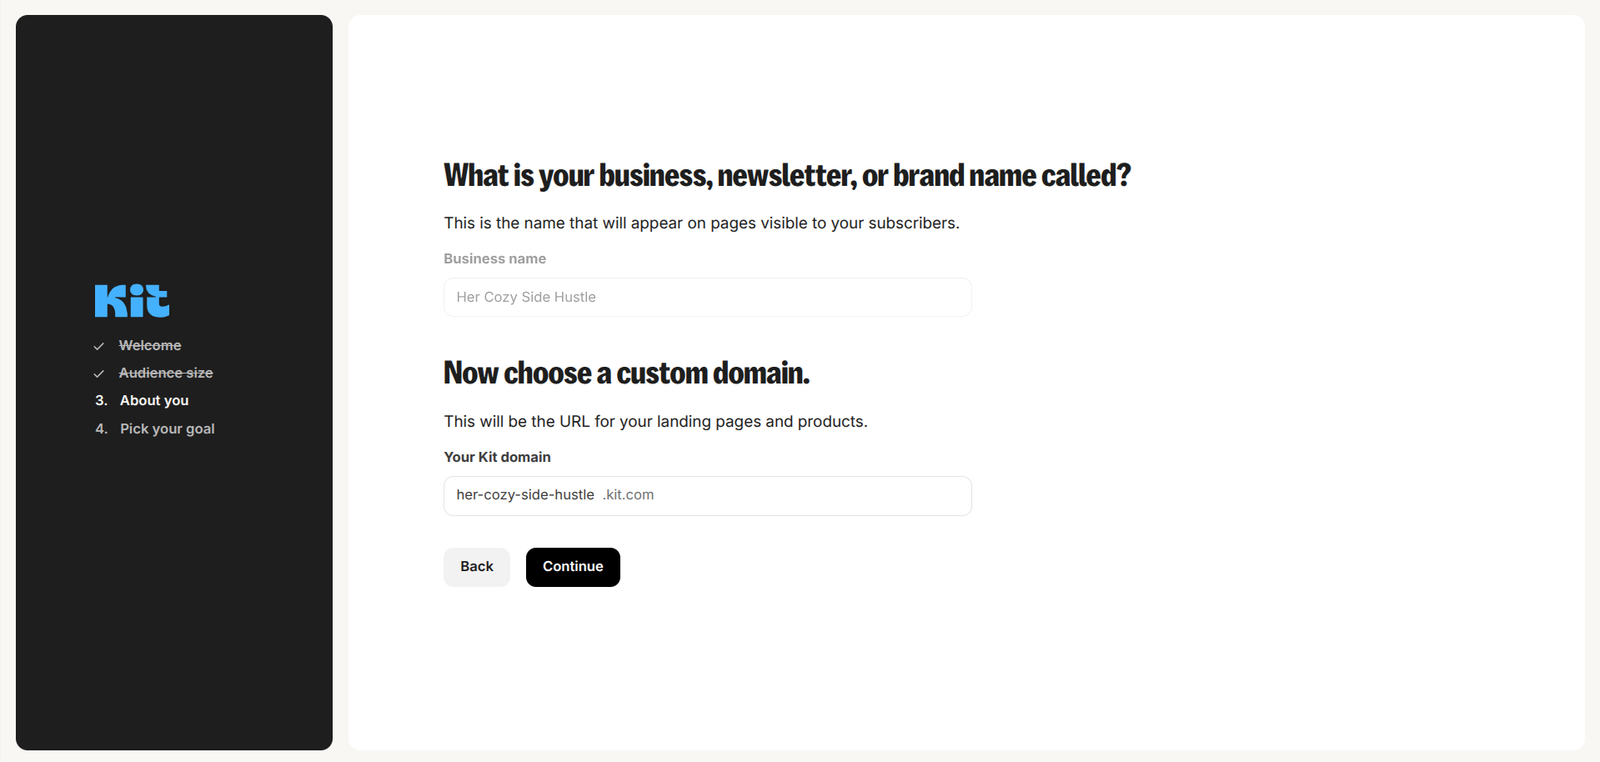
After the final question you’ll go straight into your Kit dashboard. You may see a pop-up about paid tiers, but you can just exit out of that for now.
Take a breath. You’re officially building an email list now.
Step 2: Set Up Your First Landing Page
You’re in! Welcome to your Kit dashboard. Easy right?
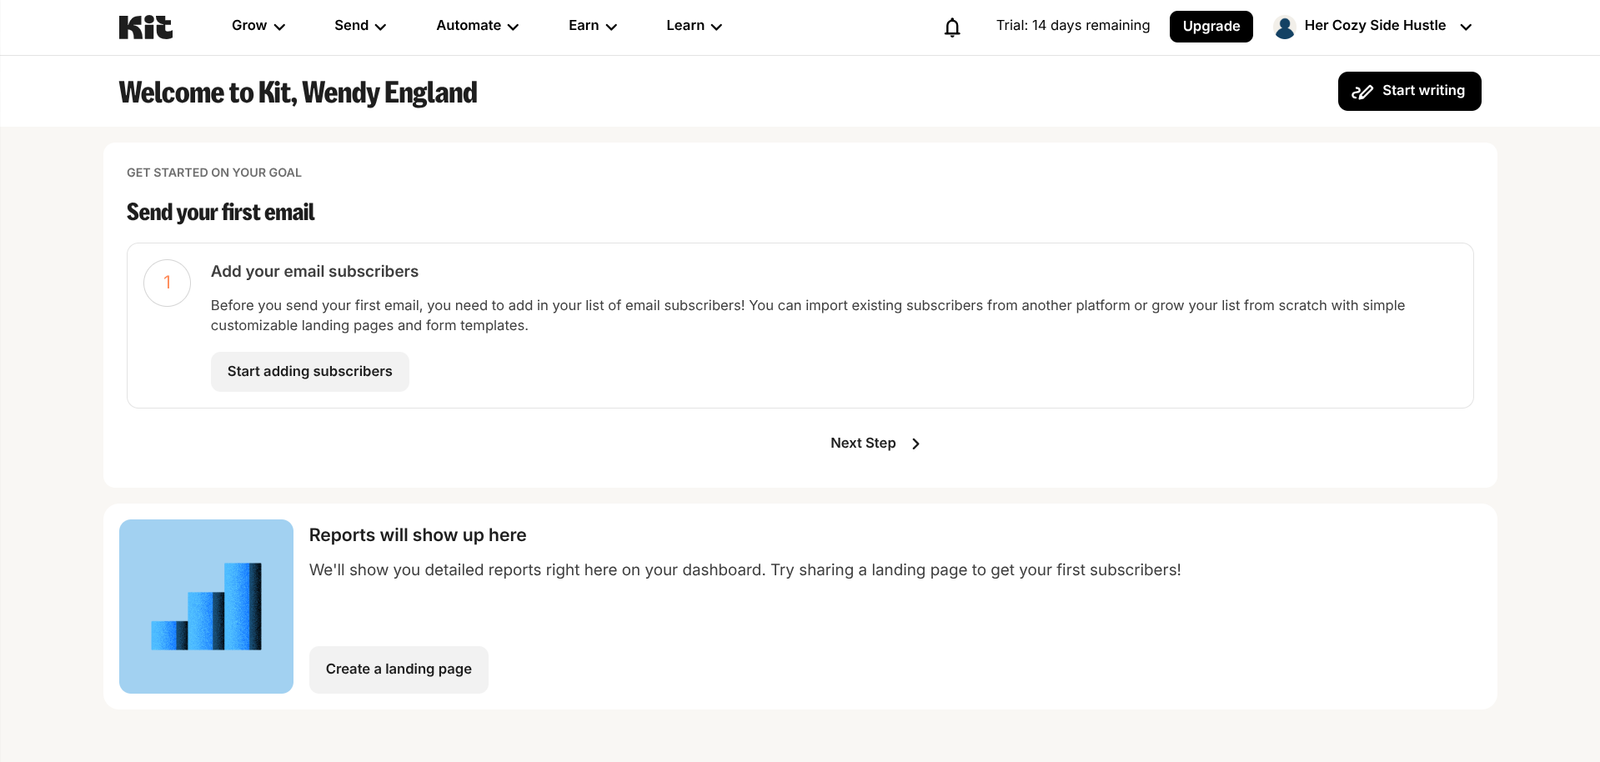
Before you start writing your first email newsletter you need a way to collect emails. Because who are you going to send your emails to otherwise?
Landing pages are a great way to grow your audience quickly, without having to have a full website. If you mostly use social media to grow your email list, you will predominately be using landing pages.
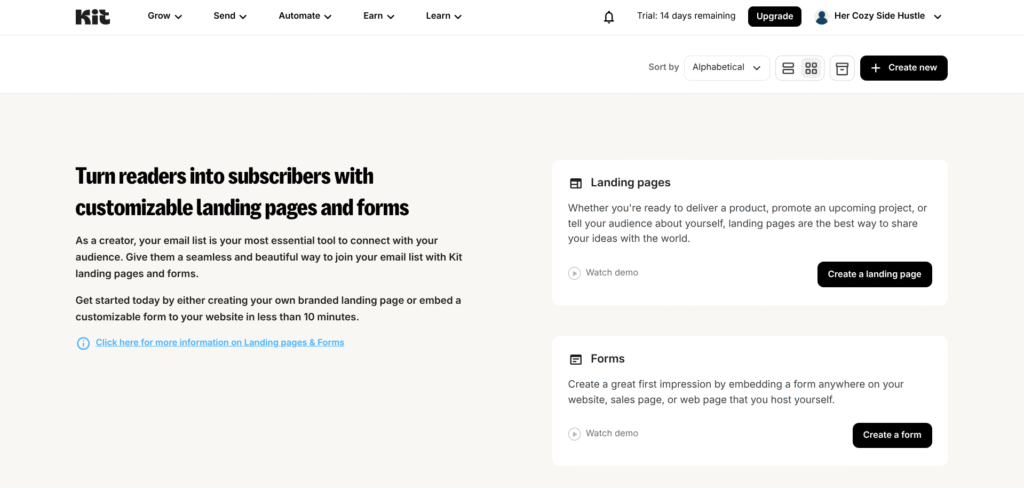
Inside your dashboard navigate to the top of the page:
- Click on Grow
- Then Landing Pages & Forms
- On the new page click Create a Landing Page
Next to that button though you will also see “Watch demo”. I highly recommend watching this. If you’re a visual learner like myself, watching this demo is a must. It goes into much more detail than I can share in a post.
The video is a little outdated but it gives you an idea of what you’ll be doing next.
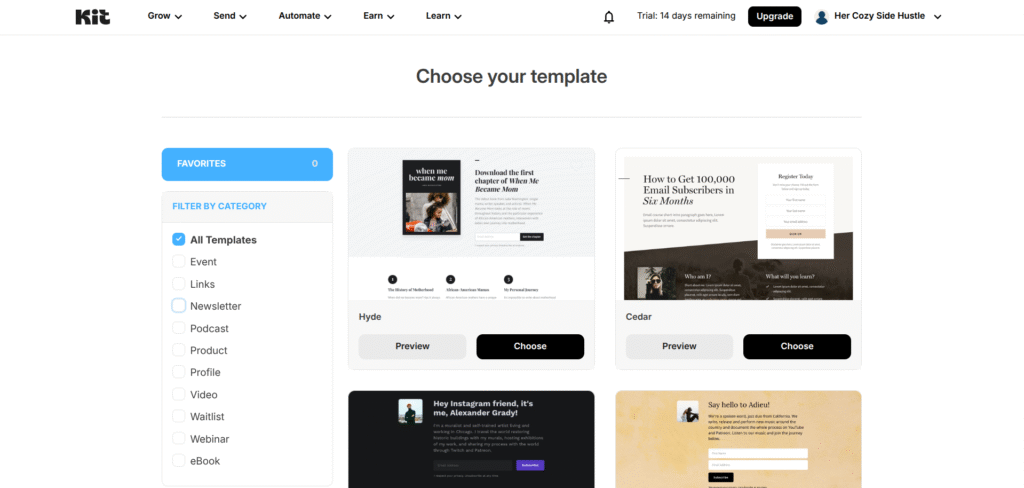
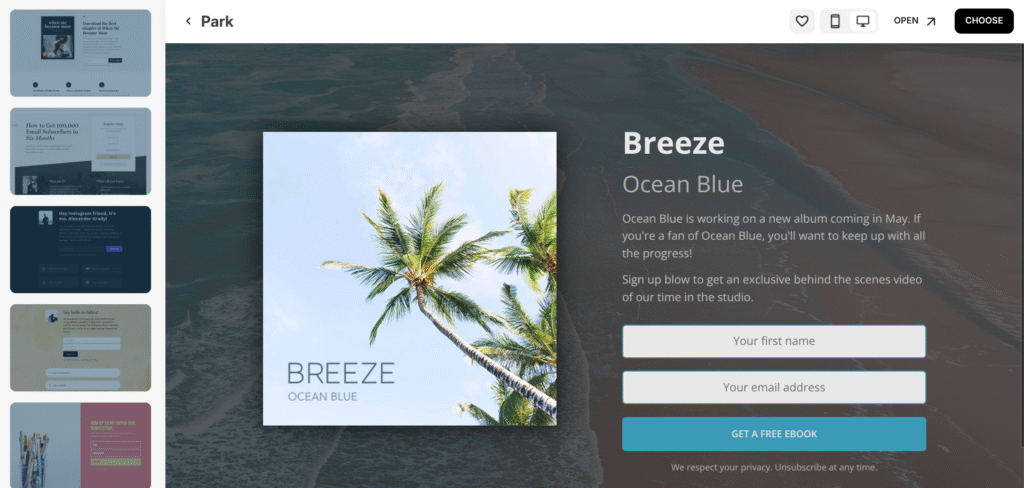
From the templates we’re going to be using ‘Park’. You can use whatever you like, but for this example this template is the simplest to get started with.
Click on preview to see how it looks, then click ‘Choose’.
I’m opting to remove the background for simplicity, so go ahead and do that. A nice white background puts the focus solely on your content. Don’t forget to change the transparency to zero.
You can edit any element of this builder right down to removing the ‘Built with Kit’ watermark (watermark removal is a paid option only).
For my own first email list I made a free image in Canva with a text overlay, that way i didn’t need any text on the form. To remove text just delete it. You can’t remove those boxes, but if there’s no text in them they don’t show on the front-end.
Once you are happy click preview to see the final landing page.
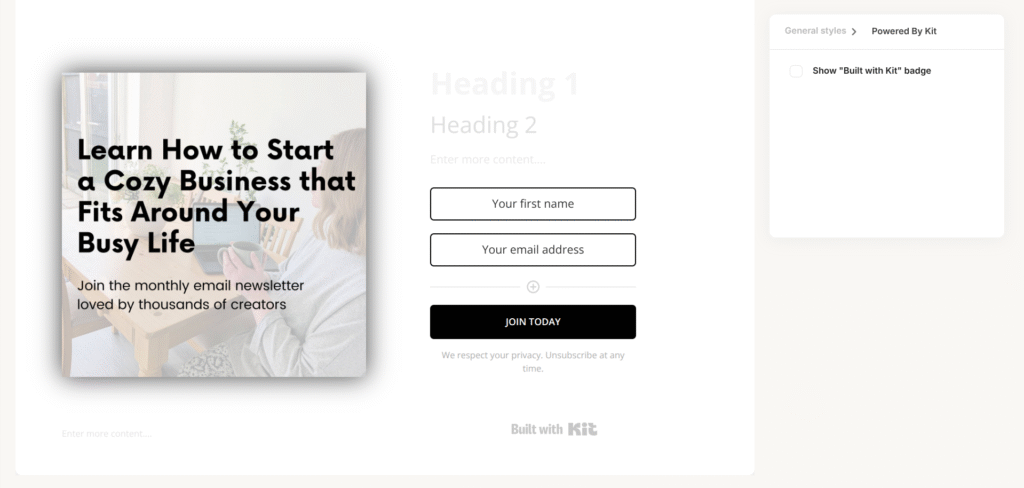
Brilliant! Now you’re cooking on gas.
The last step is to make your landing page functional. Head into settings. This is what you should see:
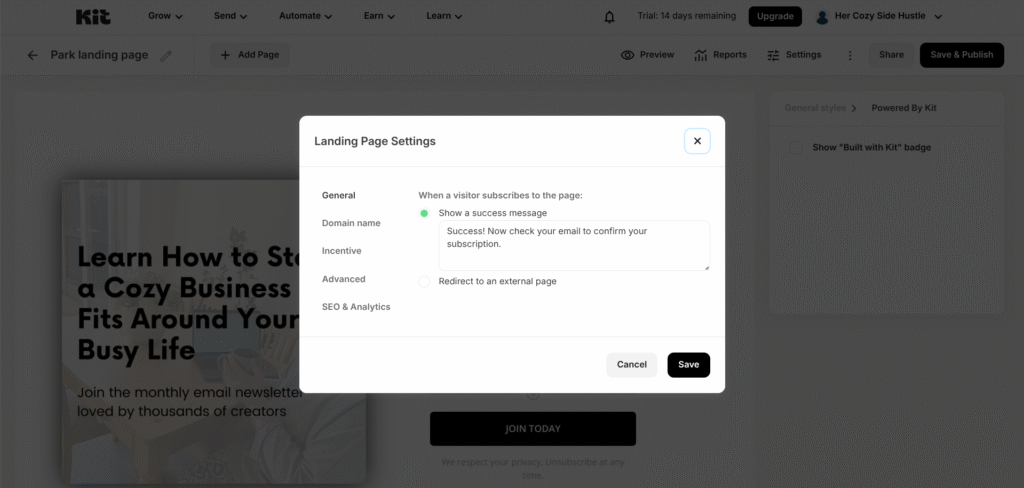
I recommend leaving the success message as is. It’s good to let people know they completed the signup rather than redirect them somewhere else.
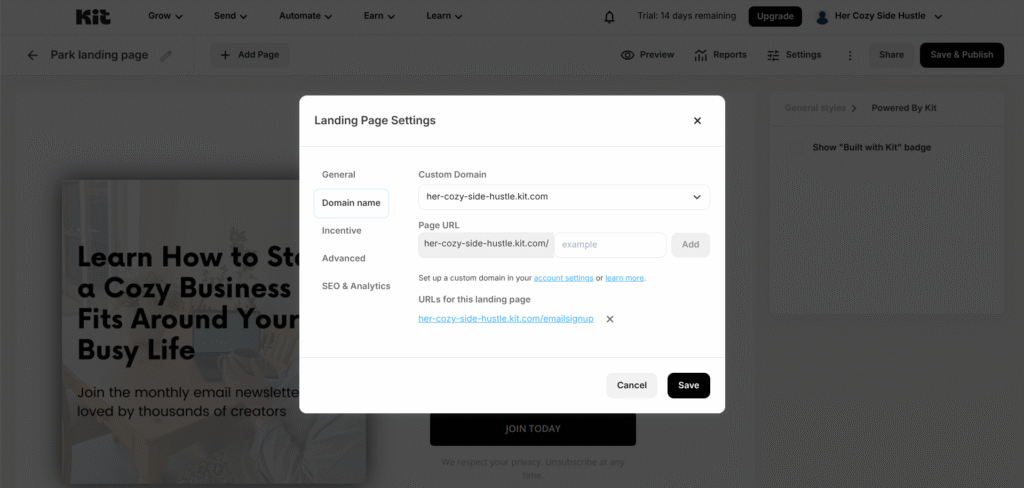
Under ‘Domain Name’ however, you need to add a page url. This will be the one you share on your socials to capture new leads. See how I did it:
Lastly, under ‘Incentive’ you’ll need to edit the contents of your incentive email. This is the automatic email that they will receive after providing their details.
A double opt-in (also known as confirmed opt-in) is a two-step process requiring a person to confirm their email address before being added to a mailing list. It stops future emails from you being marked as spam.
You can tailor it to your tone and say thank you, but ultimately you want to keep it short so they don’t miss the confirmation button.
Click Save — you’ve just created your first landing page. Congratulations!
Step 3: Write Your First Email Newsletter
Not long now and you’ll be all set up!
Now, it’s time to design an email newsletter for your new subscribers:
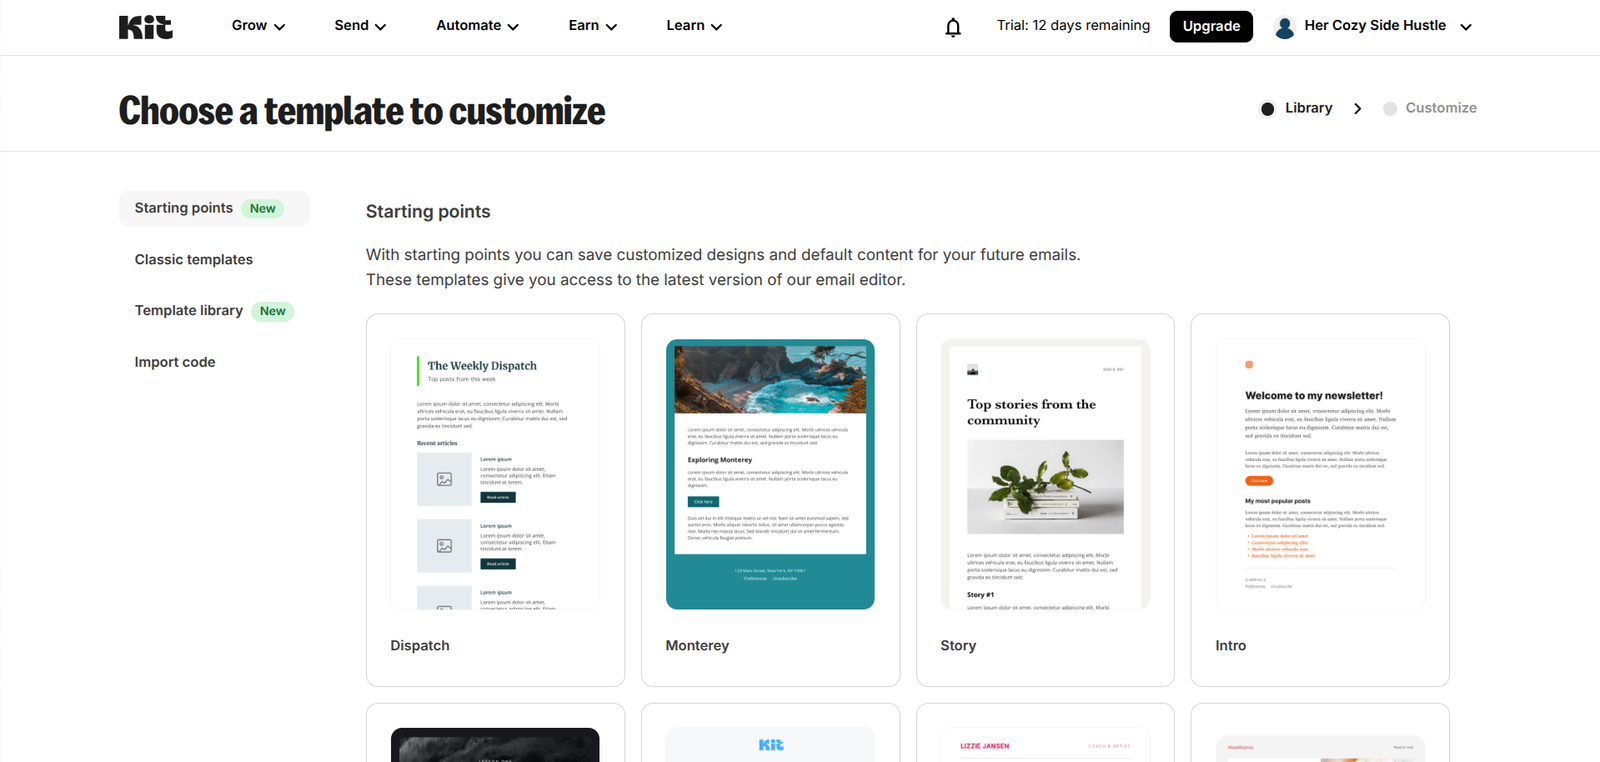
Click on “Send” from the top menu bar, then click “Email Templates”. The reason we’re choosing this rather than broadcasts is because having a template means it will make it quicker for you to write future newsletters.
In the right hand corner click on “New Email Template”. From there navigate to the right-hand side menu to click “Template Library”. This library has a mixture of paid and free aesthetic email templates to choose from.
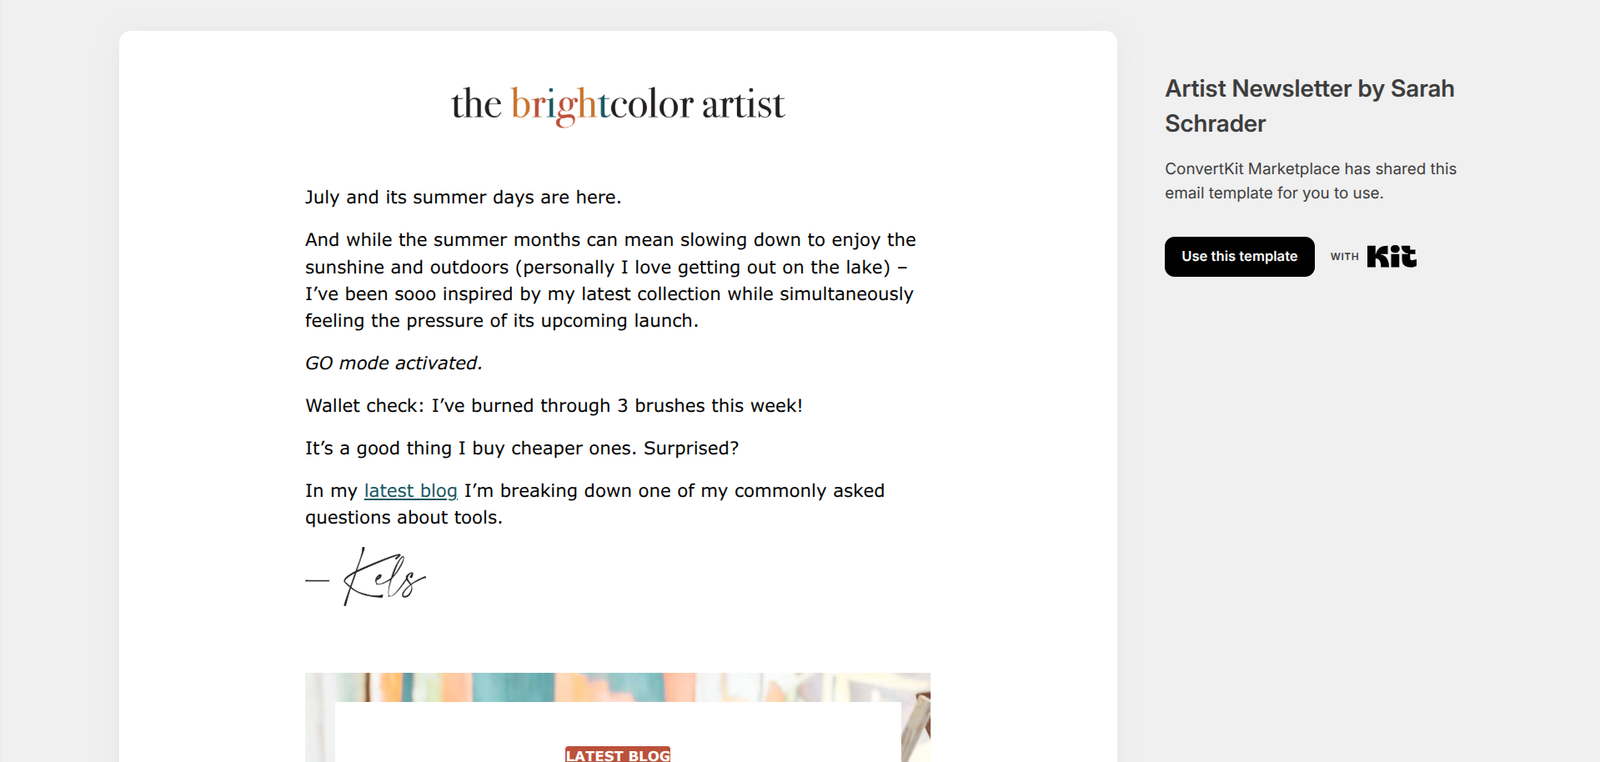
I think it’s important to personalise this email by adding a touch of your personality, and a few links to your socials or other digital products.
Simply follow the onscreen instructions.
How To Get Subscribers Fast
Kit gives you a shareable link for your landing page.
You can find it by going back to Grow – Landing Pages & Forms. Once inside your previously created landing page you’ll see, in the top right-hand corner, a share button. Click that to copy your link. It should look something like this: https://her-cozy-side-hustle.kit.com/emailsignup
You can put your link in your social media bio’s if you wish but it’s not going to give people a reason to sign up.
Ideally you want to provide value. The best thing to do is offer a freebie. This gives people something you created for free in return for their email address. If you’re unsure what to create, read 10 Done-For-You Digital Products You Can Start Selling TODAY. Any one of these can be a free digital download.
And once you know what your freebie is then your next read needs to be, How to Get Email Subscribers Fast Using a Free Opt-In
Congrats—you’ve launched your first digital product without a website! That’s no small thing.
Kit Makes Email Marketing Simple
Did you know most people need to hear about you a few times before they decide to buy?
Seven is the number that gets quoted a lot in marketing. It’s not a hard rule. Some people subscribe straight away, others need far more nudges. But the idea sticks for a reason. Familiarity builds trust.
That’s exactly why an email list matters so much. Instead of crossing your fingers and hoping someone remembers to come back, you can show up in their inbox with useful tips, updates, and the occasional reminder that you exist. No shouting. No hard sell. Just staying on their radar.
This is usually where things get a bit overwhelming. Choosing an email platform. Working out automation’s. Setting up tags and sequences. Paying yet another monthly fee. It’s easy to feel like you need to block out a whole weekend just to send one welcome email.
With Kit’s Newsletter plan built specifically for creators today, you can:
- Collect email subscribers with simple, clean sign-up forms
- Send newsletters and updates. No complicated tools
- Set up basic automation’s
- Control who sees your emails and when
Tips for Growing Your Email List
- Start small – One signup form is enough.
- Be consistent – Email once a month or once a fortnight.
- Share value – Tips, stories, lessons, links.
- Keep going! – Email lists compound over time.
- Be yourself.
Why I Recommend Kit Over a Website (at First)
I’ve tried a lot of email marketing tools over the years. Kit was my first (and easiest) newsletter provider. Flodesk was too expensive and Systeme.io was too complex.
Here’s why I suggest Kit:
- Free Tier for Creators (up to 10,000 subscribers)
- No website needed
- Clean, simple dashboard
- Grows with you when you’re ready
You can stay on the free plan while you:
- Build your list
- Learn the platform
- Figure out what you want to sell (if anything)
And when you’re ready to level up, the paid plans are a game changer. You can automate your email sequences, remove Kit’s branding, and get access to 24/7 support help.The only time you don’t need an email provider like Kit is if you use a platform like Stan Store, which I explain more about in my previous post.
Ready to Start Your Email List?
If you’ve been putting this off because you thought having an email list was expensive, or too technical… Now you know better.
You don’t need a website.
You don’t need to spend money.
You just need to start.
👉 Click here to sign up for Kit for free and start your email list today
It’s the easiest way to start an email list from scratch.