How to Start a Blog That Makes Money (in 2026)
Ever wanted to start a blog and turn it into your side hustle, but don’t know where to begin? Let me show you how!

Starting a blog changed my life. Because of blogging, my husband and I have gone from struggling to pay our rent (literally living paycheck to paycheck), we thought we’d never be able to save for a deposit—to buying our first home… in our forties!
Our life honestly feels like a dream right now. We’re living in a house we never would’ve been able to afford before starting my first blog. My husband and I both work full-time and yet, like most people who rent, we struggled to scrap together a deposit for our first house.
Because blogging has changed my life so much, I feel like I have to teach it to other people. You can’t keep something this good to yourself.
In this post, I’m going to teach you how to start a blog from scratch; no prior experience is necessary!
Disclosure: This page contains affiliate links
What do you need to start a blog?
Starting a blog is easier than you may think. You don’t truly need much to start a blog.
Here is what you need to start a blog:
- A name for your blog (what your .com is going to be)
- 15-20 minutes to actually get it started.
- An email address.
Let’s start your blog:
First, we are going to pick out your new domain name.
Picking the name for your blog:
If you plan to cover multiple topics on your blog, I recommend choosing a website name that fits them all. One easy option is to use your own name. If your first and last names aren’t available or you’d rather not use them, consider a domain name based on the following:
Personal Branding
- TheCosyHome.com – Combines a niche (home) with a lifestyle approach.
- WendyEnglandMUA.com – Uses a personal name for authority in beauty.
Niche-Focused Names
- SmartPassiveIncome.com – Clearly communicates the blog’s purpose.
- TheMapGuy.com – Focuses on travel rewards and points of interest.
Creative & Catchy
- CupofJo.com – A fun, conversational name for a Coffee blog.
- PinchofYum.com – Memorable and brandable for a food blog.
Combination of Topics
- WellnessMama.com – Blends health and motherhood.
- GamingHobbiest.com – Clearly shows you’re a casual gamer.
Other Tips for coming up with a domain name:
- Check your domain is available. It sucks when you pick out a name for your business only to see the domain (URL) is already taken.
- Use a .com first but also purchase your country’s domain – .co.uk for example
- Use something you like; I started with hercozygaming.com because I’m passionate about the games I play
Actually starting your blog:
To start a blog, you need hosting. Good hosting providers keep your blog online and install the necessary software for you to blog.
I’ve had my fair share of good and bad hosts. I only use ones that come with amazing customer care.
Having a good hosting company makes blogging super easy and hassle-free. You literally just sign up, and you’re ready to get started blogging.
In the following steps, I’m going to teach you about hosting and signing up for hosting so you can have a blog in just a couple of minutes!
First, you are going to want to click here to open Hostinger in a new tab, as this is going to be where you sign up for a blog.
Click here to open Hostinger + get a discount
Here is the step-by-step process in a guide with photos:
By now, in another tab, you should have a page that looks like the image below; if you don’t, you can click here to open that page
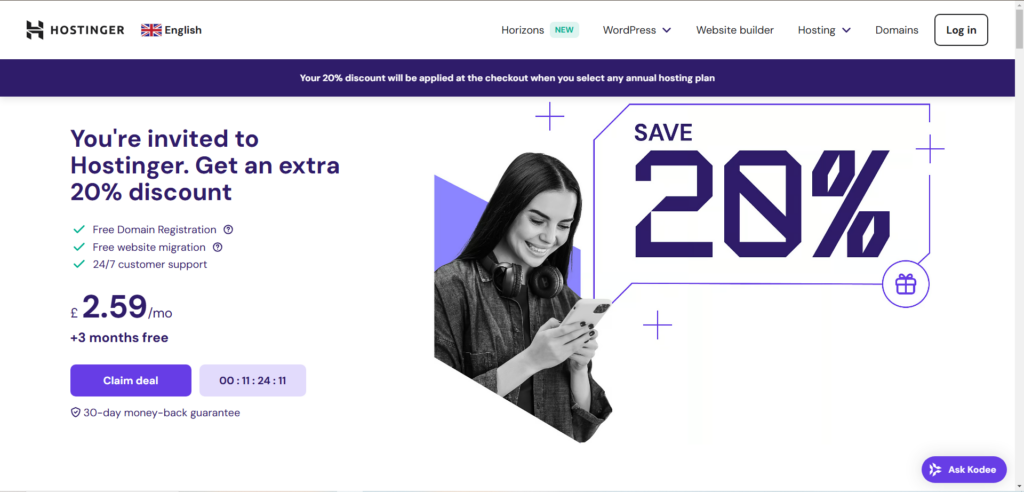
You are going to go ahead and click “Claim Deal,” which will take you to a page where you can choose a hosting plan. I recommend getting the “Business” plan because it comes with everything you need to start a profitable blog, like the Free Amazon Affiliate WordPress plugin, AI blog generator, and 40% faster loading times.
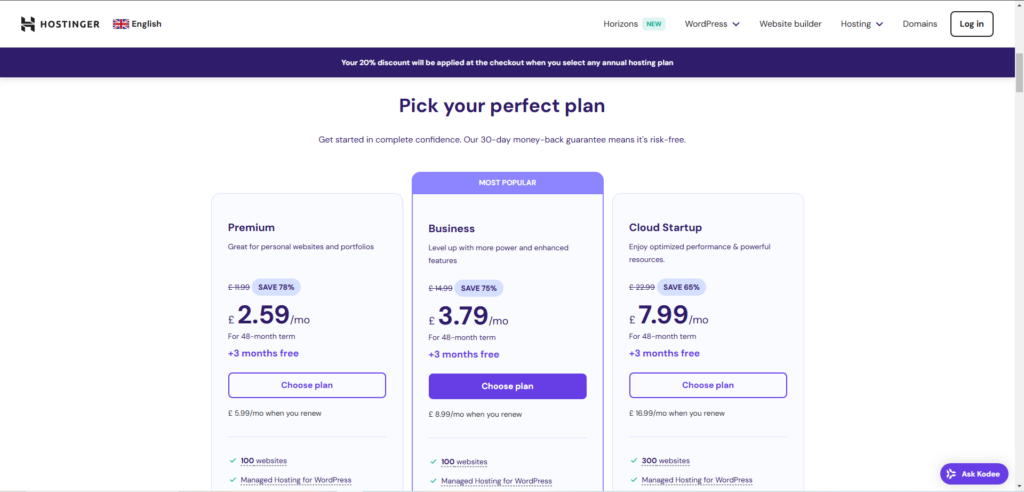
After you click “choose plan,” you are going to be taken to a screen like the one below:
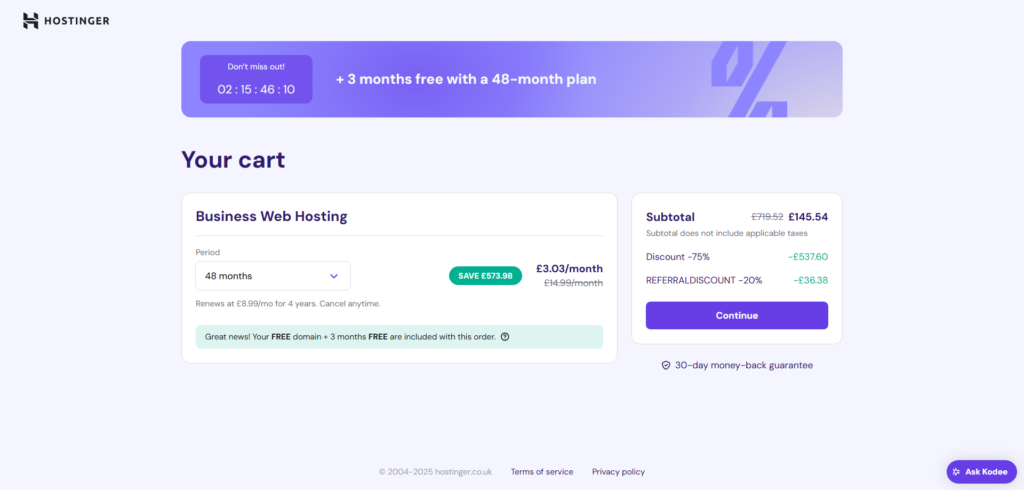
Here, you will choose how long you want your plan for. I recommend 48 months because you get a FREE domain + 3 months FREE! That’s a 75% discount. Blogging is a long game. You won’t see growth overnight. Locking in a cheaper deal over a longer period saves you money while you grow.
After you pick your plan, I mentioned above, you should be taken to this screen:
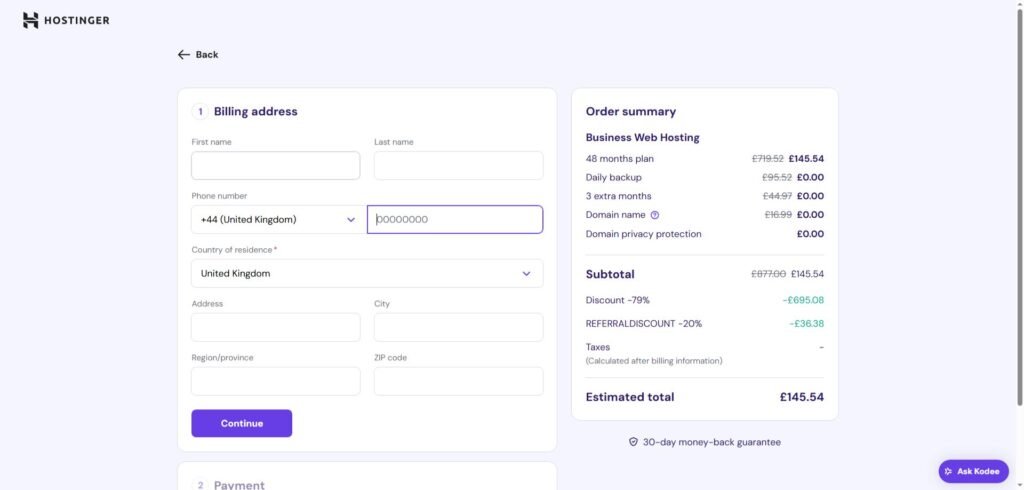
Here is where you will fill out the information for your account.
Also, don’t worry about creating a new email for your website before you sign up for Hostinger, no one is going to see this email but you. Just use your personal email for now. We’ll talk about a professional email later.
After you fill out your account information and scroll down, you will see this:
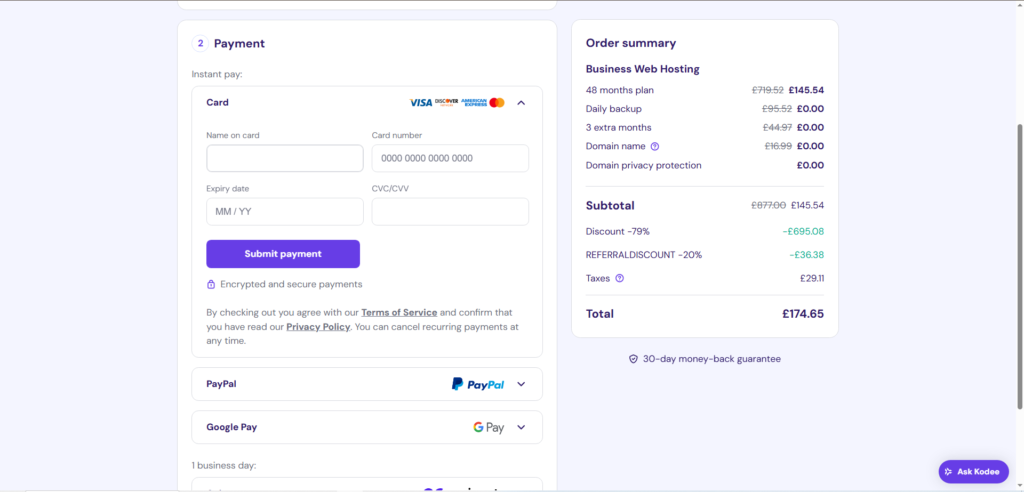
It’s time to pay (yes, it is that easy). You’ll notice this is where tax gets added on, too.
After you pay, in a few minutes, you will receive a confirmation screen letting you know everything went through. After that, you will be taken through a series of questions to set up your website.
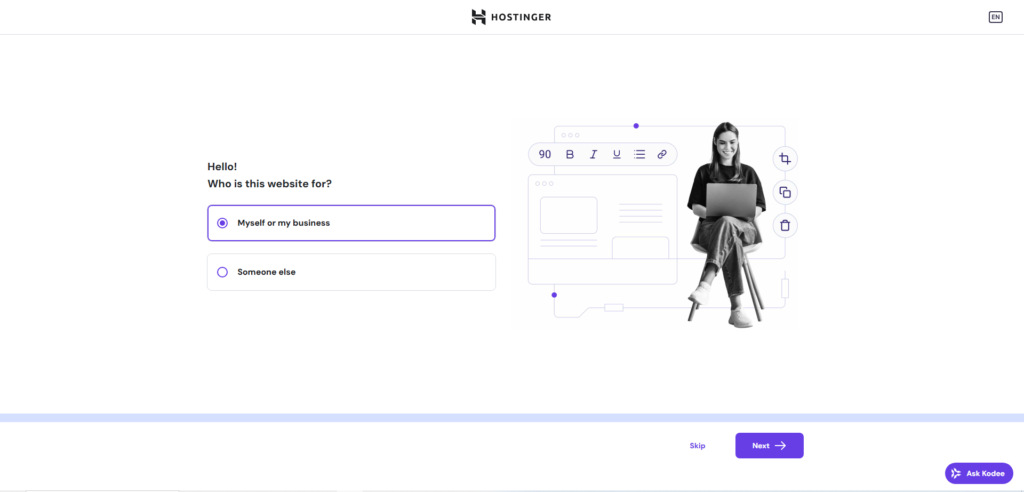
When you get to the question, ‘How do you want to build your website?’ click WordPress. You will be creating your blog from scratch this way and I’ll show you how.
Personally, I’m not a fan of Hostinger’s Website Builder.
It’s a bit too complex for my liking, and I choose to upload a theme after I finish the setup process. Don’t worry if you’re not tech-savvy, I will walk you through how to get WordPress set up.
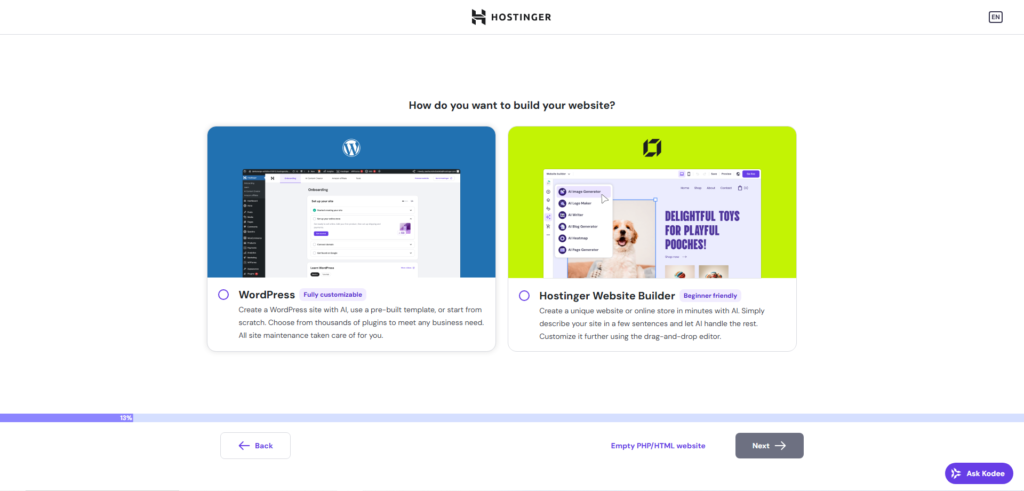
Woohoo! We almost have a blog. How exciting!
You will be building your dreams in no time.
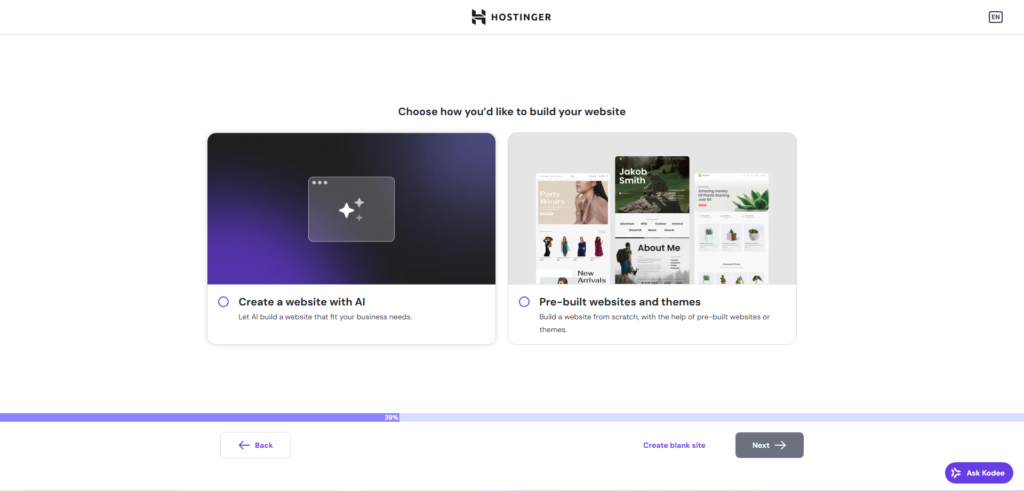
Once you reach the next slide, click Pre-built websites and themes.
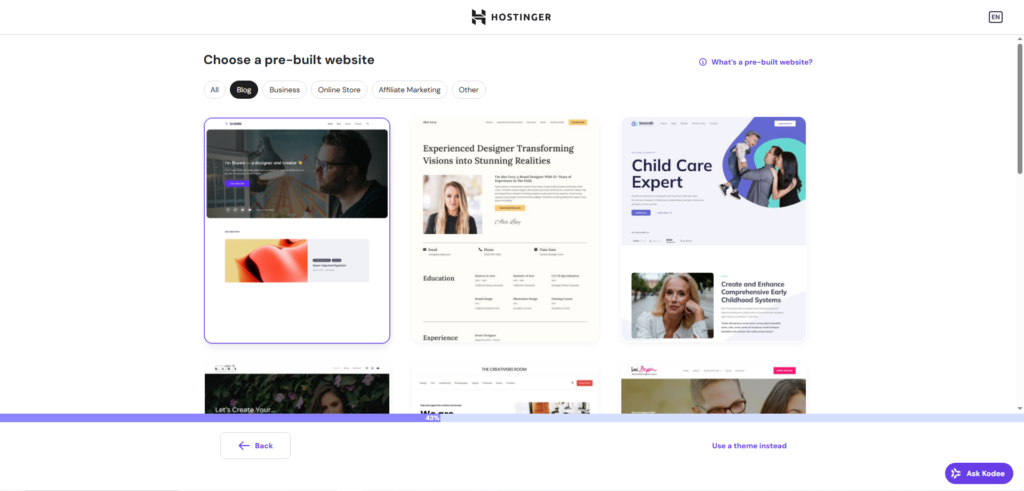
Here, you can choose a FREE theme if you don’t plan on buying one later, or click ‘Use theme instead’. If you already have a theme pre-purchased before this setup, then go ahead and follow the steps to get it installed.
I’m going to assume you don’t, so click any theme for now that you like the look of.
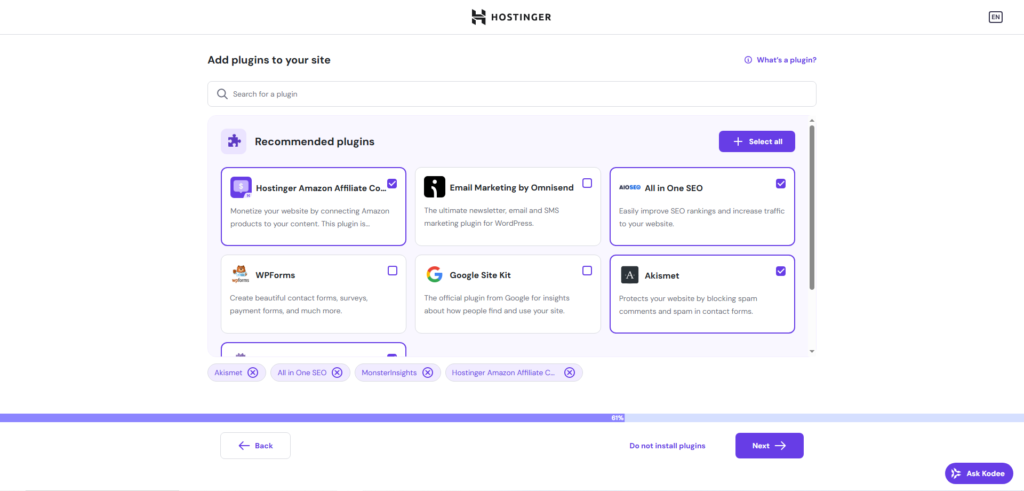
Once you click “next” after the page themes selection, you’ll be asked about plugins. I recommend checking yes to Hostinger Amazon Affiliate, All-in-One SEO, Monster Insights, and Akismet.
If you plan on having a contact form, then also click WPForms. I recommend not selecting Google Site Kit.
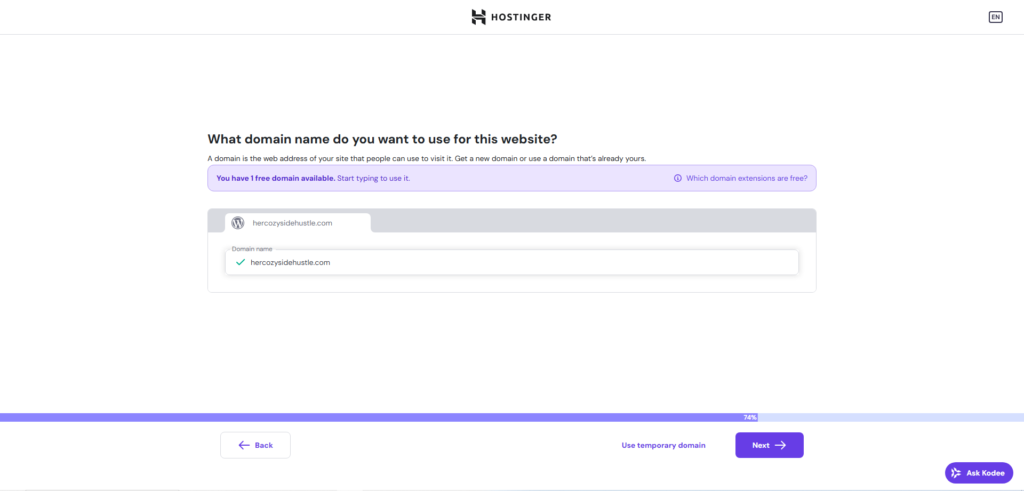
After you click next, you’re going to be prompted to “choose a domain name” which means you’re basically done!
This is your FREE domain with the business package. If you didn’t pick business, you won’t see this screen.
I already had pre-purchased my domain, so I chose that from the drop-down menu instead. I plan on saving my free domain for the co.uk URL, which I mentioned, is a good idea to get earlier.
From there, you’ll be brought to your WordPress Home page, where you can start customizing how your homepage looks.
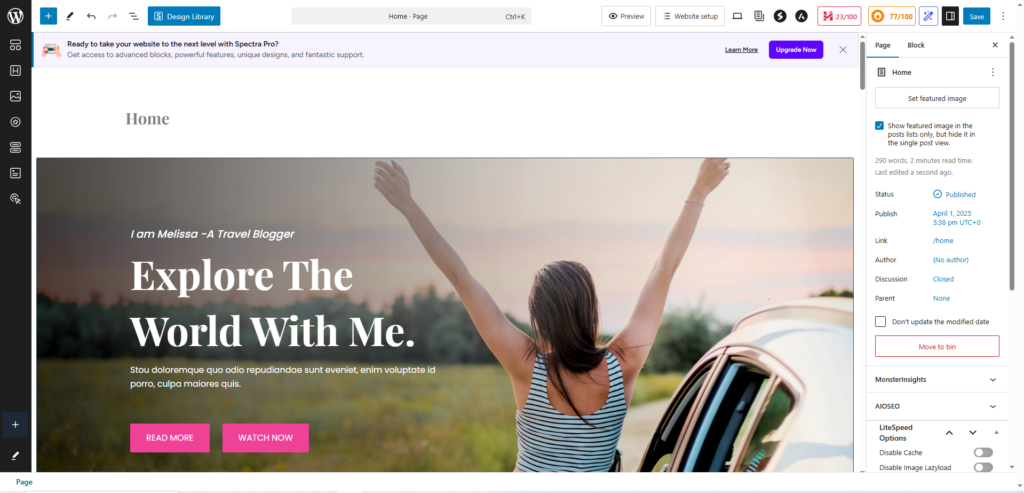
That’s it! You did it! You’ve officially got a blog, and you can start customizing your website, writing blog posts, and sharing your content!
Did you start a blog using this guide?
I get so excited whenever someone uses my guide to start a blog because I know how it can impact their life. I want to give you a shout-out if you started a blog using my guide.
On Instagram, post a story/post saying you started a blog and tag me in it (my username is @hercozysidehustle), and I’ll share it with all of my followers on my story!